 Happy New Year to everyone HERE Animation of tag. Hope everyone had a nice Christmas. Here is hoping for a great new year! *S* Tube I am using in tag is a FTU tube from a group I am in!
Monday, December 29, 2008
Happy New Year
Happy New Year to everyone HERE Animation of tag. Hope everyone had a nice Christmas. Here is hoping for a great new year! *S* Tube I am using in tag is a FTU tube from a group I am in!
Friday, December 5, 2008
Merry Christmas 11
This tutorial was written by Myrtle
on November 29 th 2008
and was written in PSP 9 any verison will work
Any simularity to any other tutorial
is purely coincidental
Tools Needed
Winter image tube
Main tube of choice
Eyecandy 4000
Mura's Mesiter
Supplies None
Open new image 700 X 700
and fill with color white Layers new raster layer
Preset shapes 10 Background color # C20000
With preshape 10 draw out shape on the left side
with ratangle shape
selections select all selections float selections defloat
Layers new raster layer
fill with a gold pattern of choice
Effects Tramages filter tow the line
Settings
Control 0 80 Control: 1 54
Control 2: 48 Control 3: 9
apply Christmas flower tube of choice
resize until fit in center of retangle
Duplicate the flower and resize 80 percent 2 times
Duplicate and resize 80 percent 2 times
and place over center flower
Duplicate and place at bottom of retangle
with freehand tool go around big retangle inside
Selections modify expand 2
Layers new raster layer Find your winter image
copy and paste as new layer
Selections invert delete Selections select none
if winter image doesn't com to top of preshape
go to color of sky and selections tool
select part of the raster layer
and fill with your color of sky
Effects Mura's Meister clouds on default
Add Christmas tubes of choice
and main tube of choice
I am using a Terry tube give all tubes
drop shadow of choice
Add your name and copyrights
I used gradient glow on my name
Gradient glow of choice
Layers new raster layer move
above white background
layer fill with color #858253
Close off layers of tubes around the winter image
copy and merge rest of layers ..
Animation Shop
paste as a new animation
Paste frames until you have 10 frames
use a snow animation gif resize until fit image
Edit select all and on image edit select all
drag and snow over image and drop in place
and if don't cover all image do same again cover all
Back to PSP
open closed layers and close off rest layers
and copy and merge other layers
and Animation Shop paste until 10 frames
Edit select all on image frames select all
back on girl image click on frame one
and drag to the other 10 frames of image
line them up and let go of mouse
Click on animation resize to where you like
and view animation if look ok save as .
Thanks for doing my tutorial
Registered with TWInc
Myrtle
Friday, November 28, 2008
Treasured Friends Award

I am so honored to have received my 1st award for this blog
by the ever so Talented Lady MZ Jen ~
Thank you xxxxxxx
I pass this Award onto 5 Beautiful Talented Ladies
Uniquescrapz
scrapsbyjessica
designsbyali
by the ever so Talented Lady MZ Jen ~
Thank you xxxxxxx
I pass this Award onto 5 Beautiful Talented Ladies
Uniquescrapz
scrapsbyjessica
designsbyali
Wednesday, November 26, 2008
French Harlem

French Harlem
This tutorial was written by Myrtle on November 26 th 2008
Any simularity to any other tutorial is purely coincidental
and was written in PSP 9 any verison should work
Tools Needed
Tubes
Scrap Kit
Template10
Eyecandy 4000
DSB Flux
Scrap Kit French Harlem HERE
Template 10 HERE
Open template 10 selections select all selections float selections defloat
on first strip of template 10 Find paper 5 from kit
copy and paste as new layer
selections invert delete selections select none
With deformation tool pull paper to edges of strip
give drop shadow of choice
click on second strip of template
selections select all selections float selections defloat
Find paper red from kit copy and paste as new layer
selections invert delete selections select none
Deformation tool pull paper to edges
give drop shadow
click on 3rd strip of template selections select all selections float defloat
copy and paste paper 5 as new layer
selections invert delete selections select none
deformation tool pull paper to ends
drop shadow
click 4th strip of template selections select all float defloat
copy and paste red paper as new layer
selections invert delete selections select none
drop shadow
now do bottom strip of template
with paper 5 same as other strips
Click on black ratangle selections select all float defloat
copy and paste paper 3 as new layer
pull paper over so some of the design is showing on retangle
selections invert delete drop shadow
Find frame 2 oval copy and paste over first oval frame of template
resize 80 percent 4 times
and with deformation tool pull to fit layer
drop shadow and dupicate and place over other template frame
Find your main tubes
I am using Terry's tubes FTU tubes
with magic wand click inside of first frame
leave the black oval of template and resize your tube
80 percent 2 times copy and paste as new layer
do this on both frames and tubes drop shadow both frames
and use elements of choice or like mine
Find the roses and with magic wand click inside the vine
and layers new raster layer and fill with color #416552
and find the red roses and yellow flowers
click on the grey strip of template
Find flat ribbon 1 rotate 90 degrees right
copy and paste as new layer
Selections invert delete Selections select none
delete the grey strip template layer
Add your name and copyrights
add gradient glow to your name if you want..
Close off all layers except the 2 red strips merge visible
Open all layers back and click on merged red layer
and Effects DSB Flux bright noise
density 35
mix 1 time click ok
animation shop paste as new animation
back to PSP
edit undo bright noise
Effects DSB Flux bright noise mix 2 times click ok
copy merge animation shop paste after current frame
back to PSP edit undo bright noise effects
DSB Flux bright noise
mix 3 times click ok
animation shop paste after current frame ..
view animation if look ok save as and resize
Thanks for doing my tutorial
Leave a finished tag url and I will post on my blog
Registered with TWInc
Myrtle
Sunday, November 23, 2008
Merry Christmas
 Merry Christmas
 This tutorial was written by Myrtle on November 23rd 2008
Any simularity to any other tutorial is purely coincidental
And was written in PSP 9 any verison will work
Tools Needed
Tubes
Scrap Kit
Template 93
Eyecandy 4000
Mura's Meister
SUPPLIES
Template 93 by Dezignsbyali HERE
Scrap Kit Victorian Christmas HERE
Open Template 93 go to layer raster 2 click on it with magic wand
Layers raster layer fill with color white
with selections tool draw from top to half way of layer
Effects Mura's Meister cloud
Effect 100
amount 100
gain 3
contrast 0
bias 0
light 0
cubic 0
blur 0
contour 0
blend mode preset menu
reset colors 3 black checked white black white click ok
Click on layers raster 4 of template
click on frame with magic wamd
fill with color white
3 D effects bevel of choice then give drop shadow of choice
copy and paste the winter tube image as new layer
selections invert delete
Find window from kit and trim out the panes with freehand tool
resize 80 percent
copy and paste as new layer over the winter image
with deformation tool pull and stretch till all sides and top
are covered with window
then click on image frame and delete template
Do frame corners same way..
From kit find valance resize 80 percent 4 times
place on window like mine
With freehand tool trim off parts of valance hanging over window
give drop shadow of choice
Find Christmas tree in kit copy and paste as new layer
resize 80 percent
delete tree template layer
Find the chair in kit and resize 80 percent
and place in front of window
drop shadow
Click on raster 1 in template
find paper 1 from kit and with magic wand click inside raster 1
copy and paste paper as new layer
with deformation tool pull paper to edges of raster 1
give drop shadow
Find grandmas frame from kit resize 5 times 80 percent
place on raster 1 of template as new layer
Find paper 2 from kit resize 80 percent 5 times
copy and paste as new layer selections invert delete
Find your main tube of choice
I am using the artwork of Keith Garvey
to use his artwork you need a license
resize 80 percent
copy and paste as new layer
selections invert delete and pull below frame
now copy and paste same tube and place by Christmas tree
give drop shadow
Layers new raster layer fill color white
move to bottom of layer pallete
Find stocking resize 80 percent 6 times
place in front of chair and give drop shadow
Place elements of choice or use mine..
I used elements from different scrap kits
Add name and copyrights
Layers close off window,valance,red flower, chair,stocking,pingium
and merge visible rest of layers
Copy merge Animation Shop paste as new animation
Find snow animation gif from supplies
resize until fit image
paste frame until you have 10 frames
go to snow animation gif and select all frames
and back on main frames select all
now drag snow over image
View snow and it is snowing
Back to PSP and close off all layers that are open
and undo rest of layers
and copy merge Animation Shop Paste as new animation
paste until you have 10 frames
Edit select all and on other 10 frames
edit select all and on other 10 frames
drag on to main frames and line them up
with the window over the snow image
then let go of mouse
View if look ok resize and save as
Thanks for doing my tutorial
Registered with TWInc
Myrtle
Friday, November 7, 2008
Tis The Season

Tis the Season
This tutorial was written by Myrtle on November 7 th 2008
Any simularity to any other tutorial is purely coincidental
and was written in psp 9 any verison will work
Tools Needed
Scrap Kit
Template 8 by ali HERE
Eyecandy 4000
Tube winter image
Supplies
Open the template layers new raster layer fill with white color
with magic wand click inside black areas
selections modity expand 2
Find paper 2 from kit copy and paste as new layer
selections invert delete selections select none
With freehand tool draw around the triangles
Effects texture effects weave
Gap size 25 width 5 Opacity 20 weave and gap color green fill gaps checked
Resize template 85 percent
with magic wand click inside of center square of template
selections modity expand 2
find your winter image of choice
copy and paste as new layer selections invert delete
move below center frame selections select none
Add elements of choice resize and drop shadow them
Place your tube of choice
I am using the artwork of Keith Garvey
to use his artwork you need a license
Add copy right and name
I used Eyecandy gradient glow to my name
Close all layers except template image text
and copy right copy merge and go to Animation Shop paste as new animation
Paste until you have 5 frames
Find your snow gif resize until fit inside of image
Edit select all and edit select all on frames
click on snow and drag it over the winter image
and when it is right over the image drop mouse
and view animation and if look ok
then back to psp open all layers
close off background ,template layer if look ok then back to psp
Open all layers and close off background template
copy merge layers Animation Shop paste as new layer
paste until you have 5 frames
Edit select all on frames and then edit select all on the snow frames
and drag the other frames
View Animation if look ok then resize your gif
and save as drop shadow on all things that need a shadow
and save as gif
thanks for doing my tutorial
Registered with TWIc
Myrtle
Thursday, November 6, 2008
Rocking Hot
This tutorial was written by Myrtle
On 10th June 2008 was written in psp9
Any similarity to any other tutorial is purely coincidental
Tools needed
Tube
Mask
Scrap-kit
Plugin DSB Flux
WSL_Mask 38 HERE
Scrap kit by kopperhead HERE
I am using the beauiful artwork of Scott Blair you must have a licence to use his artwork.
No supplies need for this tutorial
Open new canvas 600X600 white
Paper 01- resize 50 percent 2 times all layers checked, copy and paste as new layer, resize 80 percent all layers unchecked
layers load mask from disk WSL_Mask 38 source luminance checked, -fit to layer checked , show all mask checked click load , layer palette delete mask, merge group.
Find gold star resize 80 percent all layers unchecked, copy and paste as new layer
Resize on 80 percent 3 times, deform tool rotate till point is centered.
Color pallete change background color to blue,
Adjust Hue-150- Sat - 168 click ok
Drop shadow starV-H -2 -Opacity 60-blur 4- color black and drop shadow V-H -2 - Opacity 60- blur 4- color black
.find the notebook from scrap kit, resize 55 percent,copy and paste as new layer.
Adjust colorize Hue - 255-Sat -32.
Write Tattoo-Rock on the page with calligrpher font or font of choice color black and angle text
Close all layers except for the book and text, merge visible
Turn layers back on and add drop shadow to book, V-H 2-Opacity 50-blur 4.00 ,black.
Add tube of choice,move to right, look at my image, if to big resize, give same drop shadow to tube.
Find the music notes in scrap kit resize 25 percent and copy and paste as new layer
Resize 25 percent place right top look at mine and if to big resize 30 percent
Find the emb 11 resize 25 percent copy and paste as new layer place upper left side..
Duplicate both note and emb 11 and put like mine..or how you like them.
Blue sparkles from scrap kit It's a girl thing or sparkles of choice , duplicate and flip to bottom and turn off all layers except for the sparkles merge visible and turn on all layers,
Now turn off all layers except for the music notes and emb 11 merge visible,
Turn all layers back on.
Add name and copyright . Crop extra white off.
Now we are ready to animate,
Effects dsb flux bright noise layer sparkles 45 mix 1 time ok.
Now music note layer effects dsb flux bright noise mix 1 time ok
And do the star layer the same dsb flux bright noise and mix 1 time.
. Copy merged
And go to AS paste as new animation.
Back to psp edit undo bright noise, edit undo bright noise, edit undo bright noise, go layer sparkle layer effects dsb flux bright noise, mix 2 times, note layer effects dsb flux bright noise 2 times, star layer effects dsb flux bright noise mix 2 times and copy merged
Go to AS paste after current frame
Back to psp edit undo bright noise, edit undo bright noise, edit undo bright noise. Sparkle layer effects dsb flux bright noise mix 3 times. Note layer effects dsb flux bright noise mix 3 times. Star layer, effects dsb flux , bright noise mix 3 times, copy merged
Go to AS paste after current frame
Resize 85 percent 2 times
View animation
If look ok then save as.
Thanks for doing my tutorial
Myrtle
Dazzle in Pink
 This tutorial was written by Myrtle on June 12 th 2008 .
Any simuilarity to any other tutorial is purely coincindental and was written in PSP 9
Tools needed
Tube
Scrap kit
Mask
DSB Flux Filter
Scrap kit by Laura HERE
Called Delicate Delicate.. scroll back a ways to find in older post
Mask WSL_Mask 220
Put Mask WSL_Mask 220 in your psp mask folder
I am using tube from Barbara Jensen, her beauiful artwork is PTU, have to have a licence to use her artwork.
Open new canvas 600X 600 white.
Copy and paste paper 8 from the scrap kit as new layer.
Load the WSL_Mask 220 from disk
where you put your mask. ln folder merge group.
frame from scrap kit 4 copy and paste as new layer,
resize 85 percent,
drop shadow, H & V 4-4- 60-5 color same drop shadow with -4 H & V,
pink small ribbon from kit, copy and paste as new layer,
resize 55 percent, place over blue ribbon on flower on frame, with deformation tool pull ribbon until no blue is showing.
Drop shadow 4-4-60-5.
With magic wand click inside of frame selections modify expand by 4,
find paper 4 from kit resize paper 70 percent copy and paste as new layer, selections invert delete.
keep selections,
copy and paste your tube as new layer,
selection invert delete,
now copy and paste your tube as new layer,
with lasso tool circle the part from waist and hit delete.. look at mine.
Go to pretty butterfly, resize 3 times at 80 percent,
copy and paste as new layer,
place at right top of frame edge,
drop shadow, V & H 2- opacity 60- blur 3, color black,
duplicate and place at bottom left on edge of frame use deformation tool rotate till on edge of frame, look at mine.
Pink dragonfly from kit,
resize 3 times at 80 percent.
copy and paste as new layer and place top left on edge of frame, look at mine
deformation tool rotate.
Now for the text,
I used font Unicon, size 36, stroke 2, vector,foreground color blue from the butterfly and background pink from butterfly,
now write Dazzle In Pink, look at mine where I put text, convert to raster .
Add copyright and your name.
Close off all layers except butterflies, dragonfly,frame and text dazzle in pink,
merge visible these layers,
turn back on all layers.
Click on merged layer,
effects dsb flux filter, bright noise intensiy 42, mix 1-click ok,
copy merged,
AS paste as new animation.
Back to PSP and undo bright noise,
effects dsb flux bright noise, mix 2 times click ok
AS paste after curent frame.
Back to PSP undo bright noise,
effects, dsb flux bright noise mix 3 times click ok, copy merged.
AS paste after current frame,
resize 85 percent 2 times,
view animation ,
crop tool and crop off extra white and save as.
Thanks for doing my tutorial Myrtle
Wednesday, November 5, 2008
ENCIRCLED
Encircled
This tutorial was written by Myrtle on July 4th 2008
Any simularity to any other tutorial is purely coincidental
and was written in PSP 9 any verison will work
Tools needed
Scrap Kit
Mask
Alien Skin plugin
Scrap Kit by Lisa HERE
go to My Kits and click Here and go to encircled
on her download list
Encircled-freebieThanks Lisa
Mask from WSL_Mask 183 HERE
I am using the Beauiful artwork of Barbara Jensen
you must have a license to use her artwork
no supplies for this tutorial
Open new canvas 600 X 600 white
Open paper 3 from the kit copy and paste as new layer
layers load from disk WSL_Mask183 load
merge group.
Find swag 2 from kit copy and paste as new layer
resize 85 percent with deformation tool,
pull sides to edge of mask layer rotate a little to right.
Give swag drop shadow
V & H 2
opacity 80
blur 5.00
color black
copy and paste your tube,
laying down tube works better,
colorize to mack swag color
if using laying down tube put under swag
and copy and paste tube again over top of first tube
and lower the opacity
and with freehand tool go around parts that are hanging over the swag
delete
put opacity back to 100
mask layer highlight
and find brad 3 in kit copy and paste as new layer.
resize 80 percent place brad under tube
on mask layer go to Effects Mura's Meister copies
number 12
circle tile mode
behind and encircle click ok.
With deformation tool pull the circle out to look like mine
find butterfly 1 copy and paste as new layer
resize 80 percent 2 times
place bottom left rotate with deformation tool
right and give same drop shadow and place like mine
Find flower 3 copy and paste as new layer
resize 80 percent 2 times
place on bottom right
give same drop shadow..
put copyright and name
give same drop shadow..
give brad layer drop shadow..
close off both tube layers and swag layer.
on bead layer with freehand tool
go around center of the brads and go to
effects Alien Skin constellation
Star size 5.51
Size Variation 50
Edge star density 50
Overall star density 25
Overdrive 50
Twinkle Amount 75
Twinkle Rotation 45
Keep original image checked
Random seed click 1 time ok
Selections select none
copy merge AS paste as new animation
back to PSP Edit undo select none edit undo constellation
Effects Alien Skin constellation
same settings click random seed ok.
Selections select none
copy merge AS paste after current frame
Back to PSP undo select none undo constellation
Effects Alien Skin constellation same settings
click random seed 1 time ok
copy merge AS paste after current frame
Resize 85 percent 2 times
View animation if look ok save as
Thanks for doing my tutorial
leave a finished tag on my picture album
Registered with TWInc
Myrtle
Sunflower Dreams

Sunflower Dreams
This tutorial was written by Myrtle on July 5th 2008
Any simularity to any other turorial is purely coincidental
and was written in PSP 9 can be done in any verison
Tools needed
Scrap Kit
Mask
Alien Skin Plugin
Eyecandy 4000
WSL_Mask 143 HERE
Save mask to psp mask folder
Scrap Kit- ScrappinMommy Creations HERE
This scrap kit from scrappinMommy Creations is no longer there
Use any scrapkit that has sunflowers in it..
I am using a tube from Jessica Dougherty
to use her artwork you have to have a license
No supplies for this tutorial
Open new canvas 600 X 600 white
Open paper 3 from kit,resize 85 percent,
copy and paste as new layer,
layers load from disk WSL_Mask 143 load
merge group.
Find sunflower frame copy and paste as new layer,
image resize 85 percent,
with magic wand click inside of frame
selections modity expand 8.
Find glass filled sunflower 2
copy and paste as new layer,
selections invert delete ..
pull below frame layer
selections select none.
With deformation tool
pull a litte at top until not showing edges..
hight light mask layer with deformation tool
pull out a little on all sides.
Find tube and copy and paste as new layer
resize 85 percent and place to right of frame,
give drop shadow
V & H 2
opacity 80
blur 5
color black
give frame same drop shadow,
find butterfly 4 resize 85 percent
copy and paste as new layer
resize 70 percent 2 times.
Image rotate 30 left
place on frame and give same drop shadow.
Find bow 1 copy and paste as new layer
and give same drop shadow.
and place at top of frame.
If using same tube I am,
with freehand tool go around one of the sunflowers
on the tube and copy and paste like mine.
Add copyright and name
I used font Tristan from psp fonts
size 48 stroke 3 vector, color #dAAB2D
layers convert to raster layer ,
with magic wand click inside of the letters
find sunflower 2 copy and paste into selections ..
Effects Eyecandy 4000 glass
colorDAAB2D ..
Eyecandy 4000 gradient glow width 3.00
soft corners 25
Overall opacity 100
Draw only outside selection checked
Color #C37C13
give same drop shadow
Effects Alien Skin Xenofex 2 consellation
5.00 9 3 9 100 55 45
Keep original image checked
Random seed click 1 time click ok
Copy merge
AS paste as new animation,
back to PSP Edit undo consellation.
Effects Alien Skin Xenofex 2
click random seed 1 time click ok.
copy merge A S paste after current frame
Back to PSP Edit undo consellation,
Effects Alien Skin Xenofex 2 consellation
click random seed 1 time click ok.
Copy merge A S paste after current frame
and resize 85 percent 3 times.
view animation if look ok save as.
Thanks for doing my tutorial
Leave a finished tag on my picture album
Registered with TWInc,
Myrtle
I Love Denim
I Love Denim
This tutorial was written by Myrtle on July 18th 2008
Any simularity to any other tutorial is purely coincidental
and was written in PSP 9 can be done in any PSP
Tools needed
Tube
Scrap Kit
Mask
DSB Flux
Eyecandy 4000
Scrapkit by Laura HERE full kit or freebie will do I am using full kit
Pretty Denim
Mask- WSL_Mask 4 HERE
save mask to psp mask folder
Open new canvas 600 X 600 fill with white
Open paper of choice copy and paste as new layer
resize 80 percent
Layers load mask from disk
source luminance checked
fit to layer checked
show all mask checked
load delete yes merge group
find lace copy and paste as new layer
resize 80 percent
give drop shadow
V & H 2
Opacity65
blur 3
color black
Copy and paste your frame 1 or of choice from kit
resize 80 percent
place over lace layer
with magic wand click inside of frame
selections modity expand 5
find paper of choice resize 80 percent 2 times
copy and paste as new layer
selections invert delete selections select none
move paper layer under frame
click inside of frame and selections modity expand 5
find your tube of choice
I am using a Terry tube copy and paste as new layer
invert delete selections select none
move tube below frame
edit and paste tube again over the first one
give same drop shadow
and with freehand tool circle the part hanging over frame
lower opacity to 80
trim over hanging put opacity back to 100
click on mask layer
and with deformation tool pull out a little
find flower resize 70 percent 2 times and place like mine
drop shadow and duplcaite 2 times
and place like mine
find silver button resize 70 percent 3 times
place one on hat if you using same tube as I am
and duplicate 2 times and place on flower centers
find glitter doodle and resize 70 percent 2 times
and place behind frame and paper layers
Find bow resize 70 percent 2 times
and place at top of frame
find butterfly and resize 70 percent 3 times
and with deformation tool rotate till like mine
Find I love denim tag and place over frame
resize 2 times 70 percent and drop shadow..
turn off all layers except doodles
merge visible
do the same with butterfly layers
and same with flower and buttons layers
put copyright and your name font of choice
I used Eyecandy 4000 gradient glow on my name
Glow width 3.00
Soft corners 25
Overall opacity 100
Draw outside of selections checked
Glow color white
I used a denim paper for pattern for my name text
give same drop shadow
now we are ready to animate
Effects DSB Flux Bright Noise
Intensity 25
Mix 1 time click OK
do this on mask layer butterfly and doodle layers
copy merge and Animation Shop paste as new animation
back to PSP and Edit undo bright noise on all 3 layers
Effects DSB Flux bright noise
mix 2 times on all 3 layers
copy merge and to Animation Shop and paste after current frame
back to PSP and Edit undo bright noise
Effects DSB Flux bright noise mix 3 times on all 3 layers
copy merge and Animation Shop paste after current frame
veiw animation and if look ok resize 2 times on 85 percent
Thanks for doing my tutorial
Leave a finished tag on my picture album
Registered with TWInc
Myrtle
Tuesday, November 4, 2008
Rose Dawn
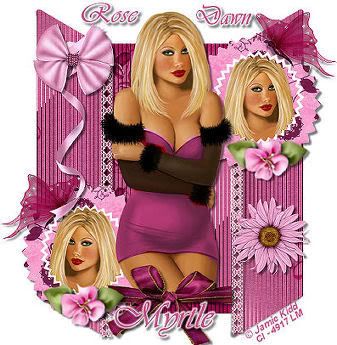 Rose Dawn
This tutorial was written on July 28th 2008
Any simularity to any other tutorial is coincidental
and was written in PSP 9 but can be done in any verison
Tools needed
Scrap Kit
Template
Tube
Eyecandy 400
Template 01 here
Scrap kit by Baby Cakes Scraps PTU -Rose Dawn
HERE
No supplies for this tutorial
Open the template 01 and open paper 10
resize 75 percent and on right template circle close the star
and with magic wand click inside the circle and
selections modity expand 2
copy and paste the paper
selections invert delete paper
and open little white ring circle and click inside with magic wand
and selections modity expand 2
copy and paste your tube
and move head inside of small circle
selections invert delete
now do bottom circle same way
click on back layer raster 3 of template
magic wand click inside
selections modity expand 2
Find paper 2 resize 75 percent copy and paste as new layer..
selections invert delete
selections select none
with deformation tool pull paper down to bottom and top
Effects Tramages filter Tow line setings
control o:80 control1: 54 control 2 48 control 3: 9 apply
On template click on raster 5 with magic wand
click inside and selections modity expand 2
copy and paste paper 8 as new layer
selections invert delete
Effects Tramages same settings tow line
selections select none
give same drop shadow
V & H 4
Opacity 50
blur 4.00
color black
duplicate left panel and mirror to right side
Find butter fly 5 resize 75 percent 2 times
copy and paste as new layer
resize 75 percent place like mine
drop shadow
Find ribbon flower resize 75 percent 6 times
copy and paste as new layer
place on frame bottom and drop shadow
and duplicate and place on top frame ..
find knotted ribbon pink resize 75 percent 2 times
copy and paste as new layer
put top left panel and
find pink pearl bow and resize 75 percent 3 times
copy and paste as new layer
and place on top of knotted ribbon
drop shadow and drop shadow knotted ribbon
Find flower 2 resize 75 percent 3 times
copy and paste as new layer
and place right bottom resize 75 percent again
copy and paste your main tube
I am using Jamie Kidd
and you must have license to use her beauiful artwork
place in center of doors colorize to match
Hue 235
Sat 128
with freehand tool draw around areas you want
to colorize and give same drop shadow
Find the sparkle bow copy and paste as new lalyer
resize 75 percent 4 times place like mine
now find lace 2 resize 75 percent 3 times
and copy and paste on panels look at mine
duplicate and mirror
and duplicate and put at the bottom
and give drop shadow
and trim off what is hanging over..
Now add your name and text
Rose Dawn with color #c9588d
I used Eyecandy 4000 Gradient Glow
Glow width 4
Soft corners 25
Overall Opacity 100
Draw only outside selections checked
Color white
Click OK
Now delete all template layers
Layers merge all flatten
Image resize 85 percent
Adjust sharpen
Resize 75 percent
Thanks for doing my tutorial
Leave a finished tag on my picture album
Registered with TWInc
~ Myrtle ~
Dream Girl
 Dream Girl
This tutorial was written by Myrtle on July 20th 2008
Any simularity to any other tutorial is purely coincidental
and was written in PSP 9 any verison will work
Tools needed
Scrapkit
Mask
DSB Flux Filter
Eyecandy 4000
Tube
Supplies
Mask here
Scrap Kit here
Open new canvas 600 X 600 fill with white
Open paper of choice copy and paste as new layer
Layers load from disk find your Zuzzanna mask 14
you save to psp mask folder fit to layer
source Luminace checked
hide mask checked click load and merge group
find frame DG frame 3 copy and paste as new layer
duplicate flip mirror look at mine
place none decorated end to end
and with freehand tool cut off ends
and place both frame pieces together and close off all layers
and merge visible
click inside of frame with magic wand
selections modity and expand 4
find your tube of choice .
I am using the beauiful artwork of Jennifer Janesko
and you have to have license to use her artwork
a laying down tube works better
copy and paste as new layer
selections invert delete and selections select none
move below the frame layer
Find the butterfly 3 copy and paste as new layer
resize 70 percent 3 times
drop shadow
V & H 2
Opacity 70
Blur 5.00
color black
Find flower pink 1 copy and paste as new layer
resize 3 times 70 percent
place right bottom frame same drop shadow
Find tag Dream copy and paste as new layer
resize 70 percent 3 times
drop shadow and place under the flower layer like mine
text font Harrington write below the dream tag
Girl font size 36 stroke 2 color #eb6798
convert to layer
Eyecandy 400 Gradient Glow
glow width 3
color white
soft corners 25
overall opacity 100
Draw only outside the selections checked
same drop shadow
Add your name and copyrights
give same drop shadow and gradient glow to name
close off all layers except for butterfly and flower layers
merge visible
with freehand tool go around the inside hearts on frames
go Effects DSB Flux and bright noise
entensity 38 click mix 1 time ok
now do mask layer and butterfly flower layer same
copy merge and animation shop paste as new animation
back to PSP and Edit undo Bright noise on all 3 layers.
Effects DSB Flux bright noise
and do all 2 layers same and click mix 2 times
. copy merge and animation shop paste after currnent frame
back to PSP and Edit undo bright noise on all 3 layers..
Effects DSB Flux bright noise and mix 3 times on all 3 layers ..
copy merge and animation shop paste after current frame.
resize 85 percent 3 times
view animation
if look ok save as
Thanks for doing my tutorial
Leave a finished tag on my picture album
Registered with TWInc
Myrtle
Monday, November 3, 2008
Oopsie Daisies
 Oopsie Daisies
 This tutorial was written by Myrtle on July 27 th 2008
Any simularity to any other tutorial is purely coincidental
and was done in PSP 9 can be done in any verison
Tools needed
Scrap Kit pieces in supplies
Tube Mask Zuzzanna_ Mask 34
Eyecandy 4000
put mask in psp mask folder
and save image to psp work area
Supply paper3
Open new canvas 600 X 600 transparent
Open paper 3 copy and paste as new layer
and resize 75 percent 2 times
copy and paste as new layer..
layers load mask from disk
and find Zuzzanna_mask 34 load
merge group
with selections tool draw a line around the center of mask area
find your image and resize 3 times 75 percent
copy and paste into selections
layers new raster layer
selections select none
Find bow 1 resize 65 percent 3 times
copy and paste as new layer resize 65 percent 3 times
place top left corner
give drop shadow
V & H 4
Opacity 50
Blur 4
color black
Find Rafiaribbon
resize 65 percent 4 times
copy and paste as new layer
with deformation tool rotate top right look at mine.
Find daisy 4 resize 50 percet 2 times
copy and paste as new layer
put over the rafiaribbon
resize 50 percent and then resize 65 percent
give same drop shadow
find daisy 3
resize 4 time 60 percent and place on each side of daisy 4
, look at mine
Find butterfly 5
resize 80 percent 3 times
copy and paste as new layer
resize 60 percent 3 times
place like mine
Find beads resize 60 percent 4 times
place like mine duplicate and mirror
erase part hanging below butterfly.
give same drop shadow
duplicate place at bottom and duplice flip
look at mine
and add your tube of choice
I am using the beauiful artwork of Dave Nestler
and it is a PTU tube
to use his artwork you have to have a license
add glitter sucker 1
resize 50 percent 3 times and place right bottom
add glitter sucker 2 and resize same and place like mine on the right side,
add your name and copyright.
I used a gradient glow on my name color #781642
Eyecandy 4000
Glow width 4.00
Soft corners 25
Overall opacity 100
Draw only outside selections checked
color white give same drop shadow
add text Oopsie Daisies
put eyecandy gradient glow same as name
on text and same drop shadow
with selection tool go around center of image
layer new raster layer
and go to Effects
VDL Adrenaline snowflakes
amount 250
suze arange begin 0
size range end 6
hardness 100
transparency 0
Basic snow
random seed 0
click ok
Adjust blur
motion blur
angle 167
stength 30
selections select none
copy merge
animation shop
paste as new animation
back PSP and do this for 2 more times
hit random seed slider
then animation shop
paste after current frame
view animation
if look ok then resize 85 percent 3 times
crop extra white off.
Thanks for doing my tutorial
leave a finished tag
in my email addy below terms of use
Registered with TWInc
~Myrtle ~
Golden Creams
Golden Creams
This tutorial was written on July 30th 2008
Any simularity to any other tutoril is purely coincidental
and was written in PSP 9 any verison will work
Tools needed
Template1
Scrap kit Freebie Golden Creams
Tramages plugin filter
Tube
Eyecandy 4000
DSB Flux
Template 1 by-
HERE
it's the 5th template on the page
Scrap kit Golden Creams is a freebie from
HERE
Open the template click on back lines
with magic wand click inside
and selections modity expand 2
Find paper1 copy and paste as new layer
selections invert delete
selections select none
Effects Tramages plugin tow the line
settings below
Control 0: 80
control 1: 54
Control 2: 48
control 3: 9
click apply
give drop shadow
V & H 4
Opacity 50
Blur 4
color Black
Template click frame layer
magic wand click inside frame
layer selections modity expand 2
Find paper 13 rotate 90 degrees left
copy and paste as new lalyer
selections invert delete selections select none
Template click on top layer
magic wand click inside
selections modity expand 2
Find paper17 copy and paste as new layer
selections invert delete
selections select none
give same drop shadow
Find frame 3 from kit copy and paste as new layer
and resize 85 percent 4 times
with magic wand click inside of frame
selections modity expand 2
Find your tube
I am using the beauiful artwork of Zindy Nielsen
an it is a PTU tube
and you have to have license to use her artwork.
if you are using same tube I used resize 80 percent 3 times
and copy and paste as new layer
placel like mine
selections invert delete
copy and paste your tube again over that tube
and give drop shadow except change H & V 2
with freehand tool trace around arms
and delete that part hanging over frame look at mine
Find flower 1 resize 4 times 80 percent
copy and paste as new layer
place bottom left of template frame..
Find heart charm resize 65 percent 3 times
place upper left corner of top layer
and with freehand tool go around bow
and delete selections select none
Find bow 3 resize 65 percent 3 times
and placl at top of heartcharm chain
give same drop shadow to bow and heart charm
Find flower4 resize 65 percent
copy and paste as new layer
place left bottom corn give drop shadow
Find doodle 4 resize75 percent
copy and paste as new layer
and place below raster 1
and duplicate and mirror look at mine
find butterfly 4 resize 75 percent 5 times
copy and paste as new layer
Place right top with deformation tool angle
and drop shadow
now delete all template layers
and merge doodle layers visible
now add your name and copyrights
use font of choice
and eyecandy 4000 gradient glow on name
I used color #b98a4f
Eyecandy gradient glow
Glow width 4
Soft corners 25
Overall opacity 100
Draw only outside selection checked
Color white
click OK
Now ready for animation
On doodle layer
Effects DSB Flux Bright noise
Intensity 35
mix 1 time
click OK
copy merge
Animation shop paste as new animation
back to PSP
Edit undo bright noise
Effects DSB Flux Bright noise mix 2 times
click OK
copy merge animation shop paste after current frame
back PSP and edit undo bright noise
Effects DSB Flux Bright noise mix 3 times
click OK
copy merge animation shop paste after current frame
click view and if look ok
resize 85 percent 3 times
and save as
Thanks for doing my tutorial
Leave a finished tag on my picture album
This tutorial is registered with TWInc
~Myrtle ~
Saturday, November 1, 2008
Feeling Blue
Feeling Blue
This tutorial was written by Myrtle on Aug.4th 2008
Any simularity to any other tutorial is purely coincidental
and was written in PSP 9 can be done in any verison
Tools needed
Scrap Kit
Mask
Eyecandy 4000
Alien Skin plugin
Tube
Scrap Kit by Frosted Illusions a PTU kit
and can't share was given by the scrap kit
site for doing tutorial
HERE
Mask from wee scots lass creations
HERE
save mask to PSP mask folder
WSL_Mask 203
The diamond I used HERE
Open new canvas 700 X 700 transparent fill with white
Open paper 9 copy and paste as new layer
Layers Load/save mask load mask WSL_Mask 203
fit to layer checked source luminace checked hide all mask checked
click load
layer click on mask and delete say yes merge group
Find frame 4 copy and paste as new layer
resize 85 percent duplicate
rezize 80 percent give drop shadow
V&H 2
Opacity 40
Blur 5
color Black
give drop shadow on both frames
with magic wand click inside of top frame
selections modity expand 4
Find your tube of choice
I am using the beauiful artwork of Barbara Jensen
and to use her artwork you have to have a license
copy and paste tube as new layer
selections invert delete selections select none
pull tube below frame
copy and paste tube again as new layer
give drop shadow and place over with freehand tool
trim over hanging on frame of tube
delete and selections select none
add what elements of choice
and place a diamond in each hole on frame
and close off all layers except for the diamonds
and merge visible
Find blossom 1 resize 70 percent 3 times
copy and paste as new layer
resize 50 percent
place on frame like mine
drop shadow duplicate image mirror
Find butterfly 5 resize 70 percent 2 times
and place like mine drop shadow
duplicate give drop shadow
Find double bow 1 image resize 70 percent 2 times
copy and paste as new layer
place under diamond layer duplicate mirror
Find bead heart charm resize 70 percent 3 times
with freehand tool circle beaded tear delete
selections select none
place heart like mine and duplicate drop shadow
close all layers except flower layer behind tube
merge visible
Open all layers back
add name and copy rights
font of choice and color # 3b6ca9
I used Eyecandy 4000 gradient glow
on my name and text writing
Glow width 4.00
Soft corners 25
Overall opacity 100
draw only outside selections checked
click ok and give drop shadow
close all layers except butterfly
merge visible
unclose all layers
Now ready for animation
Select butterfly layer
Effects Alien Skin Xenofex2 constellation
Star size 2 22 6 4 100 75 twinkle rotation 45
keep original image checked
click ok
do same effects on flower layer click ok..
copy merge animation shop paste as new animation
back to PSP
Edit undo constellation on butterfly adn flower layers
Effects alien skin xenofex 2 constellation
same settings click random seed 1 time click ok
copy merge animation shop paste after current frame
back to PSP
Edit undo constellation on both layers
Effects alien skin xenofex2
butterfly layer click random seed
and do flower layer same way and click ok
copy merge animation shop paste after current frame
view animation
and if look ok resize and save as
Thanks for doing my tutorial
leave a finished tag on my picture album
Registered with TWInc
~ Myrtle ~
This tutorial was written by Myrtle on Aug.4th 2008
Any simularity to any other tutorial is purely coincidental
and was written in PSP 9 can be done in any verison
Tools needed
Scrap Kit
Mask
Eyecandy 4000
Alien Skin plugin
Tube
Scrap Kit by Frosted Illusions a PTU kit
and can't
site for doing tutorial
HERE
Mask from wee scots lass creations
HERE
save mask to PSP mask folder
WSL_Mask 203
The diamond I used HERE
Open new canvas 700 X 700 transparent fill with white
Open paper 9 copy and paste as new layer
Layers Load/save mask load mask WSL_Mask 203
fit to layer checked source luminace checked hide all mask checked
click load
layer click on mask and delete say yes merge group
Find frame 4 copy and paste as new layer
resize 85 percent duplicate
rezize 80 percent give drop shadow
V&H 2
Opacity 40
Blur 5
color Black
give drop shadow on both frames
with magic wand click inside of top frame
selections modity expand 4
Find your tube of choice
I am using the beauiful artwork of Barbara Jensen
and to use her artwork you have to have a license
copy and paste tube as new layer
selections invert delete selections select none
pull tube below frame
copy and paste tube again as new layer
give drop shadow and place over with freehand tool
trim over hanging on frame of tube
delete and selections select none
add what elements of choice
and place a diamond in each hole on frame
and close off all layers except for the diamonds
and merge visible
Find blossom 1 resize 70 percent 3 times
copy and paste as new layer
resize 50 percent
place on frame like mine
drop shadow duplicate image mirror
Find butterfly 5 resize 70 percent 2 times
and place like mine drop shadow
duplicate give drop shadow
Find double bow 1 image resize 70 percent 2 times
copy and paste as new layer
place under diamond layer duplicate mirror
Find bead heart charm resize 70 percent 3 times
with freehand tool circle beaded tear delete
selections select none
place heart like mine and duplicate drop shadow
close all layers except flower layer behind tube
merge visible
Open all layers back
add name and copy rights
font of choice and color # 3b6ca9
I used Eyecandy 4000 gradient glow
on my name and text writing
Glow width 4.00
Soft corners 25
Overall opacity 100
draw only outside selections checked
click ok and give drop shadow
close all layers except butterfly
merge visible
unclose all layers
Now ready for animation
Select butterfly layer
Effects Alien Skin Xenofex2 constellation
Star size 2 22 6 4 100 75 twinkle rotation 45
keep original image checked
click ok
do same effects on flower layer click ok..
copy merge animation shop paste as new animation
back to PSP
Edit undo constellation on butterfly adn flower layers
Effects alien skin xenofex 2 constellation
same settings click random seed 1 time click ok
copy merge animation shop paste after current frame
back to PSP
Edit undo constellation on both layers
Effects alien skin xenofex2
butterfly layer click random seed
and do flower layer same way and click ok
copy merge animation shop paste after current frame
view animation
and if look ok resize and save as
Thanks for doing my tutorial
leave a finished tag on my picture album
Registered with TWInc
~ Myrtle ~
Summer Storm
Summer Storm
This tutorial was written by Myrtle on August 10th 2008
Any simularity to any other tutorial is purely coincidental
and was written in PSP 9 any verison will work
Tools Needed
Scrap Kit
Tube of choice
Image
Template
Tramage plugin
Eyecandy 4000
VDL Adrenaline snowflakes
Scrap kit freebie
http://leatheo.blogspot.com/2008/08/summer-storm-freebie.html
Template 22
http://divineintentionz.blogspot.com/
Open template with magic wand click on frame
selections modity expand 4 click ok
Find your image of choice copy and paste as new layer
selections invert delete selections select none
Template click on shape with magic wand
selections modity expand 4
Find paper 10 from kit copy and paste as new layer
selections invert delete
selections select none
Effects Tramage plugin tow the line
Control 0: 80
Control 1: 54
Control 2: 48
Control 3: 9
click ok
Template frame with magic wand click
and fill with a gold gradient
graphic plus filter cross shadow
selections select none
add elements of choice from kit
give drop shadow to all elements
V & H 2
Opacity 70
blur 5.00
color black
click ok
add tube of choice
mine is from the beauiful artwork of UpYourArt
copy and paste as new layer
resize 7o percent 2 times
and place like mine
Find element 29
copy and paste as new layer
resize 70 percent 5 times
place like mine and duplicate 3 times
and place like mine
Add name and copyright
and give gradient glow to name
Glow width 4
Soft corners 25
Overall Opacity 100
Draw only outside selection checked
color white click ok
Give same drop shadow.
delete all template layers
Click on image layer with magic wand
click inside of frame layer
new raster layer
rename rain on raster raster
Effects V D L Adrenaline snowflakes
amount 250
size range begin 0
size range end 6
Hardness 100
Transparency 0
Basic snow
Random Seed 0
click ok
Adjust blur Motion Blur
angle 167
Strengh 30
click ok
Selections select none
copy merge Animation Shop paste as new animation
Back PSP Edit undo selection
select none on snowflakes and blur motion
Effects snowflakes move the slider to 5
Adjust Motion Blur selections select none
copy merge Animation Shop paste after current frame.
Back to PSP and edit undo snowflakes and motion blur
Effects Snowflakes move random seed slider to 10
Adjust Motion Blur click ok ..
Copy merge Animation Shop paste after current frame
View animation
if look ok resize 85 percent 2 times
save as
Thanks for doing my tutorial
leave a finished tag on my picture album
Registered with TWInc
~ Myrtle ~
Follow That Dream
 Follow That Dream
This tutorial was written by Myrtle on August12th 2008
Any simularity to any other tutorial is purely coincidental
and was written in PSP 9 will work in any verison
Tools needed
Scrap Kit
5 tubes of choice
Mask
Eyecandy 4000
Scrap Kit freebie from http://bitsnpiecesofqbd.blogspot.com/
Password for the kit is THANKS all in caps ok
Mask from Becky_Mask022
HERE
save mask to PSP mask folder
Open new canvas 600 X 600 transparent fill with white
Open paper 03 copy and paste as new layer
Layers load/save mask load mask from disk
and find Becky_Mask 021 load
merge group resize 85 percent
Find torn paper 01 copy and paste as new layer
resize 85 percent 3 times
give drop shadow
V & H 2
Opacity 40
Blur 5.00
Black
Find journal 01 copy and paste as new layer
resize 85 percent give same drop shadow
Find filmstrip 02 copy and paste as new layer
resize 85 percent 2 times
With magic wand click inside of filmstrip
and copy and paste tube of choice
in filmstrip place your main tube out to side on right ..
Find bow 03 resize 75 percent copy and paste as new layer
resize 70 percent 2 times place at top
give drop shadow
Find film 01 resize 75 percent 3 times
place like mine give drop shadow
Find movie clapboard resize 75 percent
copy and paste as new layer
resize 50 percent place left bottom
resize 65 percent give drop shadow
Find bead Heartbreak Hotel resize 65 percent 2 times
place on left side
Find ribbon of choice follow that dream
resize 65 percent 3 times
place side of bead give drop shadow..
Add your name and copyrights
I used Eyecandy 4000 gradient glow on my name and text
Glow width 4
soft corners 25
Overall opacity 100
Draw only outside selections checked
Layers merge flatten all
Thanks for doing my tutorial
Leave a finished tag on my picture album
Registered with TWI nc
~ Myrtle ~
Friday, October 31, 2008
Christmas Honeies

This tutorial was written by Myrtle
Was written on Dec 12th 2010
Was written in PSP 9
Any verison will work
Any Simularity to any other tutorial
is purely Coincidental
Tools Needed
Template#119
Scrap Kit
Tubes
Image
Filters
Eyecandy 4000
VanDerLee Snowflake
SUPPLIES
Look for the Doodle1 and Christmas Carol Image
Scrap Kit by FantasyDreamsDesignzs Magic Christmas FTU
HERE
Template#119 by Designsbyali
HERE
Tubes of Choice
I am using artwork from Keith Garvey
HERE
to use his artwork you need A License# to use
Font of choice
Open Templace#119
Image Canvas size 800X800 Pixels
You can resize later
Delete Copyrights and Dele Raster 5 and copy of raster 5
go to Image Rotate Free Rotate
Rotate Raster 3 90Degrees Right
Place like mine
Raster 1 Image Rotate 90 Degrees Left
and same for Frame Layer
Open your supplies and place Doodle Image on workspace
Templace #119 Click on Raster 1
Selections Select All
Float
Defloat
Find the Image from the supplies
Copy and paste into Selections
Selections Select None
Layers New Raster Layer
and move to bottom of Template#119
Fill with Color White
Click on Raster 2 from Template#119
Selections Select All
Float
Defloat
Layers New Raster Fill with Color # 577858
Selections Select None
Click on Frame Effects Graphic Plus
Cross Shadow Default Settings
Click Ok
Effects 3D Effects Drop Shadow of Choice
Template#119 Click on Raster 3
Selections Select All
Float
Defloat
Fill with Color White
Find your tubes of Choice
I am using artwork from Keith Garvey
and you need a License# to use his artwork
Copy and Paste tube as New layer
Selections Invert Delete
Selections Select None
Template#119 Click on Raster 4
Selections Select All
Float
Defloat
Layers New Raster Layer
Fill with Color #577858
Effects Graphic Plus Cross Shadow
Default Settings
Selections Select None
Drop Shadow
Preshape Tool
Draw out a circled behind your Image
Look at mine Color #9d0000
Effects Texture Effects
Weave
Settings
Gap Size 2
Width 4
Opacity 5
Weave Color White
Gap Color White
Fill Gaps Checked
Click Ok
Drop Shadow
Copy and Paste your laying down tube
Look at mine Resize 80 Percent
Drop Shadow
Find your Doodle 1 from supplies
Copy and Paste as New Layer
resize 80 percent
Use Deformation Tool
to stretch and Fit like mine
Selections Select All
Float
Defloat
Layers New Raster Layer Fill with Color #9d0000
Duplicate Flip Fit like mine
Effects Graphic Plus
Cross Shadow Default Settings
Drop Shadow
Scrap Kit Elements 2 and 3 Copy and Paste
as new layers and resize to look like mine
With Freehand Tool cut the loops off the Elements
Place like mine
Scrap Kit Christmas Bow 2 Element
Copy and Paste as new layer
Place like mine Resize 80 zpercent 2 times
Drop Shadow
Add any Elements of Choice
Give Drop Shadow
Add your name and Copyrights
I gave my name and Christmas Honies Gradient Glow
EyeCandy 4000 Gradient Glow
Settings
Glow Width 3.00
Soft Corners 25
Overall Opacity 100
Draw Only Outside Selections Checked
Click Ok
Ready to Animate
Click on Image
Selections Select All
Float
Defloat
Effects VanDerLee Snowflakes
Settings
Amount 20
Minimum Size 0
Maximum Size 20
Hardness 100
Transparentcy 0
Snow Color Basic Snow
Random Seed 0
Click Ok
CopyMerge
Animation Shop
Paste as New Animation
Back PSP Edit Undo Selections
Same Settings Random Seed 4
Copy Merge
Animation Shop
Paste After Currant Frame
Back PSP Edit Undo Selections
Edit Undo Snow
Effects VanDerLee Snowflakes
Same Settings Random Seed 7
CopyMerge
Animation Shop
Paste After Currant Frame
Animation Resize
Animation Frame Properties 45
Click Ok
View Animation if look ok
Save As
Thanks for doing my tutorial
Registered with TWInc
Hope you enjoyed doing my tutorial
as much as I did writing it
~~~~~~ Myrtle ~~~~~~
Thursday, October 30, 2008
English Rose
English Rose
This tutorial was written by Myrtle on August 21st
and was written in PSP 9 any verison will work
Tools needed
Scrap Kit
Tube
Template 4
Tramages filter
Alien Skin
Eyecandy 4000
Scrap Kit by
http://designsbydee.blogspot.com/2008/08/my-english-rose-kit.html
Template4 here
scroll down to template4
Open template 4 on flower circle find paper 5
on template with magic wand click inside of flower
layer copy and paste paper 4
selections invert delete
give drop shadow
V & H 1
Opacity55
Blur 5.00
Color Black
Effects Tramages filter tow the line
Control 0: 80
Control 1: 54
Control 2: 48
Control 3: 9
Find flower 2 Adjust Hue 242 Sat 104
image resize 60 percent copy and paste as new layer
resize 40 percent 2 times and resize 45 percent 1 time
deformation tool pull out on all sides some
Duplicate 5 times and place over each flower hole on template
click on grey square and highlight..
Find paper 7 on square click with magic wand
selections modifty expand 2
copy and paste paper 7
resize paper 70 percent 6 times
selections invert delete selections select none.
Copy and paste your tube of choice
I am using the Beauiful artwork of SC Basheff
you have to have a license to use her artwork..
resize 80 percent 2 times
give drop shadow
V & H 2
Opacity 55
Blur 5.00
Color Black
Find binder 1 resize 80 percent 2 times
copy and paste as new layer
resize 55 percent 3 times
then resize 60 percent 3 times
and place top left corner of square
give same drop shadow
Find doily 2 resize 60 percent 2 times
copy and paste as new layer
resize 60 percent 3 times and place bottom right corner
give same drop shadow
Duplicate resize 75 percent place like mine
Find bow 1 resize 75 percent
copy and paste as new layer
resize as needed and place behind tube
Find paper clip 1 the square one
circle with freehand tool resize to your liking place right top ..
with freehand tool go around center part of clip look at mine
delete that part give drop shadow..
Find pearls resize 65 percent
copy and paste as new layer
Find paper 2 resize 75 percent 4 times
with magic wand click on bars of template
selections modifty expand 2
copy and paste paper new layer
selections invert delete selections select none..
give same drop shadow
Find pearls string resize 50 percent copy and paste as new layer..
Adjust size to fit on bar layer
adjust colorize Hue 243 Sat 85 click ok
Find heart 3 resize 45 percent 2 times
copy and paste as new layer
drop shadow place on end of bars
and duplicate mirror, delete all template layers
add your name and copyrights
I used eyecandy 4000 gradient glow on my name
Glow width 3.00
Soft corners 25
Overall opacity 100
draw only outside selections
Draw only outside selections checked
close off all layers except the flowers,merge visible
Effects Alien Skin Xenofex2 constellation
star size 2
size variation 6
edge star density 25
overall star density 25
overdrive 50
twinkle amount 75
twinkle rotation 45
Keep original image checked
random seed 1 click ok..
copy merge animation shop paste as new animation
back to PSP Edit undo constellation
Effects Alien Skin Xenofex2 constellation
everything same settings click random seed click ok
copy merge animation shop paste after current frame
back PSP edit undo constellation
Effects Alien Skin Xenofex2 constellation
click random seed and copy merge animation
shop paste after current frame
view animation if look ok resize 85 percent
and save as
Thanks for doing my tutorial
leave a finished tag in my email address under terms of use
Registered with TWInc
~ Myrtle ~
Earth Babes
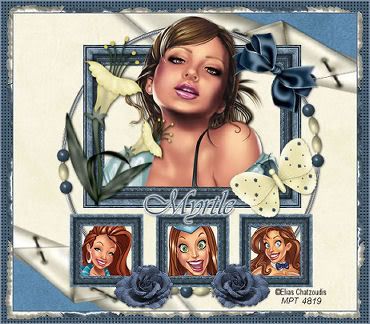
EARTH BABES
This tutorial was written by Myrtle on August 23rd 2008
and was written in PSP 9 any verison will work..
Any simularity to any other tutorial is purely coincidental
Tools needed
Scrap kit
Template
Eyecandy 4000
4 tubes of choice
Scrap Kit Freebie here
called Earth
Template HERE
Open Template and open paper 8
copy and paste as new layer
Find paper earth fold copy and paste as new layer
place like mine and paste as new layer again and turn
with deformation tool like mine
and with freehand tool take out a section from upper left corner
to lower right corner delete selections select none
click on top frame of template
adjust colorzie
Hue 145
Sat 45
click ok
Find bow 3 resize on 80 percent 2 times
copy and paste as new layer..
place top corner and if need resize again
Find flower 1 copy and paste as new layer
resize 80 percent 2 times place left side of frame
Find butterfly 1 resize 2 times 80 percent
place bottom right corner
Find frame bead circle copy and paste as new layer
behind frame and give all elements drop shadow
V & H 1
opacity 55
blur 5.00
color black
Find your main tube of choice
I am using the beauiful artwork of Elias Chatzoudis HERE
this is a ptu tube and you have to have a license to use his artwork
With magic wand click inside top frame
selections modifty 4
copy and paste tube as new layer.
selections invert delete
now paste tube again over the other tube
layer pallete lower opacity to 40
and with freehand tool circle part hanging over frame delete
and put opacity back to 100
on layer pallete Template bottom 3 frame
adjust colorize same color as before
and with magic wand click inside each frame
selections modifty expand 4
copy and paste your 3 tubes as you did top frame
but not paste again..
selections invert delete
Find earth rose resize 80 percent 4 times
copy and paste as new layer and place like mine
and duplicate mirror,
Add your name and copyrights
on my name I used Gradient Glow..
Glow width 4.00
Soft corners 25
Overall Opacity 100
Draw only Outside selections checked
click ok
merge all layers flatten
Image add border 2 with color #405a71
Image add border 20 with color # 618798
click inside of border with magic wand
Effects Reflections effects Kaleidoscope with settings below
Everything on ~0~ except put petals on 10
edge mode click wrap.
click ok
Keep selected
Effects 3D effects inner Bevel with settings below
Bevel 2
width 10
Smoothness 55
Ambunce -27
Shinness 46
Intensity 31
Angle 135
Elevation 88
color white click ok
Adjust Sharpness sharpen select none..
With magic wand click inside of blue
Effects texture effects weave
gap size 2
width 4
Opacity 3
weave and gap color #000000
fill gaps checked
click ok
selections select none.
Image add border 2 color #405a71
resize and save as
Thanks for doing my tutorial
Leave a finished tag on my picture album
Registered with TWInc
~ Myrtle~
Daisies and Lace
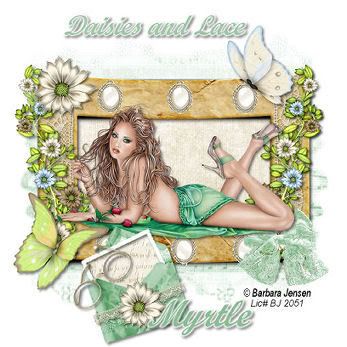
Daisies and Lace
This tutorial was written by Myrtle on August 27th 2008
Any simularity to any other tutorial is purely coincidental
and was written in PSP 9 any verison will work
Tools Needed
Scrap Kit
Mask
Tube
Eyecandy 4000
Scrap Kit by- Cinnamonscraps Daisies and Lace
http://cinnamonscraps.blogspot.com
Tube of Choice I am using artwork from Barbara Jensen HERE
WSL_Mask 233 HERE
put mask in psp mask folder
Open new canvas 600 X 600 transparent
fill with color white
Open paper 5 from kit resize 85 percent
copy and paste as new layer
load mask from disk WSL_Mask 233
fit to layer checked source luminance
checked hide all mask checked click load
delete mask yes
merge group
resize 85 percent
Find frame 6 resize 85 percent
copy and paste as new layer
place over mask layer
with deformation tool pull mask out around frame
high light frame layer and with magic wand click inside of frame
selections modity expand 4
Find paper 8 resize 85 percent copy and paste as new layer
selections invert delete selections select none
move paper below frame layer
Frame magic wand click inside of frame
and find your tube of choice
I am using the beauiful artwork of Barbara Jensen
and to use her artwork you have to have a license
resize 85 percent copy and paste as new layer
selections invert delete
selections select none
resize again the tube 85 percent
and copy and paste over other tube
look at mine give drop shadow
V & H 3
Opacity 50
Blur 6
color Black
give frame same drop shadow
Find lace bow 4 resize 85 percent 3 times
copy and paste as new layer
place over the bow on frame
and adjust colorize
Hue 93
Sat 71
click ok
Find butterfly 7 resize 85 percent 2 times
copy and paste as new layer
place left bottom corner same drop shadow..
Find flower 1 resize 70 percent 2 times
copy and paste as new layer
place top left on frame give same drop shadow
Find envelope 4 resize 70 percent 2 times
copy and paste as new layer
resize 80 percent 2 times
Find paper 3 resize 70 percent 3 times
with magic wand click inside envelope
selections modity expand 4
copy and paste paper as new layer
selections invert delete selections select none
give envelope same drop shadow..
Find butterfly 4 resize 80 percent 2 times
copy and paste as new layer resize 80 percent
same drop shadow and place right side on top of frame
give envelope same colorize as bow
and find laceribbon 2 resize to fit on envelope place across envelope
daisy flower duplicate the one on left top frame
and resize 80 percent 2 times
place over flower on envelope
Find branches 2 resize 80 percent 2 times
place on side of frame drop shadow
duplicate and mirror
Find charm 1 resize 80 percent 3 times
copy and paste as new layer
resize 80 percent and place on top of frame
duplicate 3 times and place like mine
Find glasses and resize 80 percent 5 times
and place like mine
drop shadow
Add your name and copy rights
I used font Script MT Bold from PSP fonts
size 48
stroke 3
vector
color #8cbe96
I used Eyecandy 4000 gradient glow
Glow width 4
Soft corners 25
Overall Opacity 100
Draw Only Outside Selections Checked
color white
merge Layers flatten
resize 85 percent
Thanks for doing my tutorial
Leave a finished tag on my picture album
Registered with TWInc
~Myrtle~
Wednesday, October 29, 2008
Happy Halloween
 Happy Halloween
This tutorial was written by Myrtle on September 13th 2008
Any simularity to any other tutorial is purely coincidental and was written in PSP 9
any verison will work
Tools Needed
Scrap Kit
Tube
DSB Flux Filter
Eyecandy 4000
Mask
Tramages Filter
Template
Scrap Kit Orange Beauty http://designsbyali.blogspot.com/
Halloween Template 5
http://designsbyali.blogspot.com
Bats and pumpkin tubes of choice
Open template layers raster layer drag to bottom and fill color white
go to template click on overlay layer and find paper 10
image resize 80 percent copy and paste as new layer
with magic wand click on overlay layer ..
selections modity expand 2 paste the paper as new layer
selections invert delete selections select none..
with deformation tool pull sides out to cover
Effects Tramages Filter Tow the line
Control 0: 80
Control 1: 54
Control 2: 48
Control 3: 9
click apply
Template click on back shape
Find frame 3 resize 80 percent 2 times copy and paste as new layer
give drop shadow of choice duplicate
and with freehand tool cut the ends of frame to make one frame look at mine
Close off all layers except frame layers and merge visible turn all layers back on..
give frame drop shadow
with magic wand click inside of frame selections modity expand 15
Find paper 11 resize 80 percent
Find your haunted house of choice tube frame layer click inside with magic wand
modity expad 5 selections invert delete
Find your tube of choice
I am using artwork of Keith Garvey Tubes
to use his art work you have to have a licesne
HERE
resize your tube 80 percent 2 times
Find pumpkins of choice tube resize 75 percent 2 times and move below spider layer
Find butterfly resize 70 percent 3 times..
copy and paste as new layer put on pumpkins .
add elements of choice
Add name and copyrights
I used eyecandy 400 gradient glow on my name.
Glow width 3.00
Soft corners 25
Overall Opacity 100
Draw only outside selections checked Click Ok
color for glow Orange
With freehand tool trace around your tube hat if you are using same tube as I am
DSB FLux Filter Duplicate 2 times
Effects DSB Flux Bright noise
Intensity 25 Mix 1 click ok
selections select none
copy merge Animation Shop paste as new animation
back PSP Edit undo select none undo bright noise
Effects DSB Flux Bright noise Mix 2 click ok
copy merge Animation Shop paste after current frame
Back PSP Edit undo select none undo bright noise
Effects DSB Flux bright noise mix 3 click ok
copy merge Animation Shop paste after current frame
view animation if look ok resize save as
Thanks for doing my tutorial
Leave a finished tag on my picture album
Registered with TWInc
~ Myrtle ~
Lowery's Babes
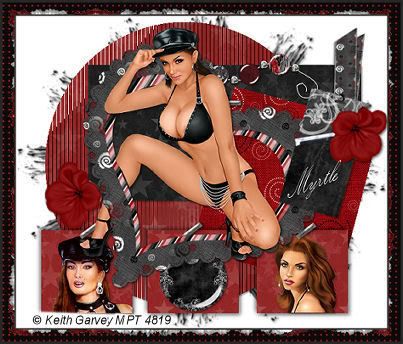 Lowery's Babes
This tutorial was written by Myrtle on September 16th 2008
Any simularity to any other tutorial is purely coincidental and was written in PSP 9
any verison will work
Tools Needed
Mask
Scrap Kit
Tubes 3
Tramages Filter Tow The Line
Template 24
Scrap Kit Kirsue HERE
Template 24 http://candystreats.blogspot.com/
Mask WSL_Mask 178 HERE
put mask in psp mask folder
Open template 24 new raster layer fill with color white drag to bottom
new raster layer fill with color black drag to top of white layer
Layers load/save mask load from disk find mask WSL_Mask 178
merge group with deformatiom tool pull mask out on all sides
On template click on black circle click inside with magic wand
selections modity expand 3
Find paper stars 1 resize 85 percent copy and paste as new layer
selections invert delete selections select none
click on white layer of template magic wand click inside
Find stars paper 3 resize 85 percent copy and paste as new layer
selections invert delete selections select none
On black star layer highlight find wirebeads copy and paste as new layer resize 80 percent
Effects drop shadow
V&H 2
Opacity 40
Blur 4.00
color black
Find tag 7 resize 80 percent copy and paste as new layer
and place on red square layer use deformation tool rotate and give same drop shadow
Click on bottom 3 frame of template and with magic wand click inside of frames
with stars paper 1 copy and paste as new layer
selections invert delete selections select none
With tubes of choice I am using artwork of Tim Lowery
and to use his artwork you have to have license
selections select all
on bottom 3 frame of template selections float selections defloat
resize tubes and place on first and third frames
Give same drop shadow
Find button 9 resize 80 percent 2 times copy and paste on center frame
give same drop shadow and same drop shadow to the frame layer
change V & H to minus 2
Find heart frame resize 75 percent copy and paste as new layer
and with deformation tool angle heart frame like mine
give same drop shadow
Find ribbon fold resize 80 percent and place on top of tag and with freehand tool cut string off tag
Find main tube resize 80 percent and place over heart frame
and lower opacity and with freehand tool
draw around the part of leg on frame delete put opacity bac to 100 percent
with freehand tool cut flower off copy of tag and resize 80 percent 2 times
and place on top of 3 frame layer look at mine
Add name and copyright put name on tag
Click on template round layer with magic wand modity expand 3
find star 1 paper copy and paste as new layer selections select none
Effects Tramages filter Tow The Line
Control 0: 80
Control 1: 54
Control 2: 48
Control 3: 9
click apply
Image add border 4 pixel black
Image add border 20 pixels #871212
with magic wand click inside of border
Effects Reflections effects Kaleidescope evrything on _0_ except number of petals 10
Wrap selected click Ok
Effects Alien Skin Xenofex 2 Crumple
settings
Crumple size 7.00
Crumple force 50
Distort image checked
Direction 60
Inclination 58
Highlight brighness 19.47
Highlight size 5120
Highlight color white
Light Boost 50
Random seed 8139
click ok
Selections select none
click inside of white part fill with black
Effects Texture effects weave
Gap size 3
Width 7
Opacity 3
Weave and Gap color #871213
Fill Gaps selected Click Ok
Selections select none
Image add border 4 pixels black
Thanks for doing my tutorial
Leave a finished tag on my picture album
Registered with TWInc
~ Myrtle ~
SpookyLicious

SpookyLicious
This tutorial was written by Myrtle on September 6th 2008
Any simularity to any other tutorial is purely coincidental and was written in PSP 9
can be done in any verison
Tools Needed
Mask WSL_Mask 145
Tube
Scrap Kit- SpookyLicious
Eyecandy 4000
DSB Flux Filter
Scrap Kit SpookyLicious http://www.deliciousscraps.com
Mask WSL_Mask 145 http://www.weescotslass.co.uk/
put mask in PSP mask folder
Open new canvas 500X500 transparent fill with color white
Open paper 5 resize 70 percent 5 times
copy and paste as new layer resize 70 percent
Find frame round with bow on it resize 70 percent 2 times
copy and paste as new layer
and with magic wand click inside of frame
and click below ribbon selections modity expand 3
Find paper 6 resize 70 percent 6 times
copy and paste as new layer move paper like mine
selections invert delete move paper below frame selections select none
Find spider web resize 70 percent 4 times
copy and paste as new layer place like mine if need resize70 percent
Find spider and resize 70 percent 3 times place on web
Find your tube of choice
I am using the artwork of Elias Chabzoudz.
to use his artwork you will need a license
resize tube 70 percent and place left side of frame
Add elements of choice resize and give drop shadow of choice
For text write SpookyLicious with paper 5 resize till smaller and patern ..
with Rockwell Extra Bold font Size 36 stroke 3
I used Eyecandy 4000 Gradient Glow
Default Glow width 3.00
Soft corners 25
Overall opacity 100
Draw only outside selections checked
Color Orange
click OK
Add name and copyright do name same as text
Merge all layers
image add border 3 pixel color # cd7119
Image add border 20 pixel any light color
magic wand click inside of border
find paper 5 make pattern for background color fill Keep selected
Effects Reflections effects Kaleudoscope
settings everything on _0_
except number of petals on _10_
click wrap click OK
Magic wand click inside white area fill with color #ac5ao6
Keep selected effects texture effects weave
Gap size 3
width 4
weave and gap color black
fill gaps checked click ok
Selections select none
Image border pixel 3 color #cd7119
With freehand tool draw around eyes and d mouth of pumpkin duplicate 2 times
DSB Flux Bright noise Intensity 35
mix 1 time click ok do layer 2 same only mix 2 times click ok
do layer 3 same way only mix 3 times click ok
Selections select none
Close off layers 2 and 3 on layer 1 copy merge
Animation Shop paste as new animation
Back to PSP close layer 1 unx layer 2
copy merge Animation Shop paste after current frame
Back to PSP close layer 2 and unx layer 3
copy merge Animation Shop paste after current frame
View animation if look ok resize and save as..
Thanks for doing my tutorial
Leave a finished tag on my picture album
Registered with TWInc
~ Myrtle ~
Subscribe to:
Posts (Atom)