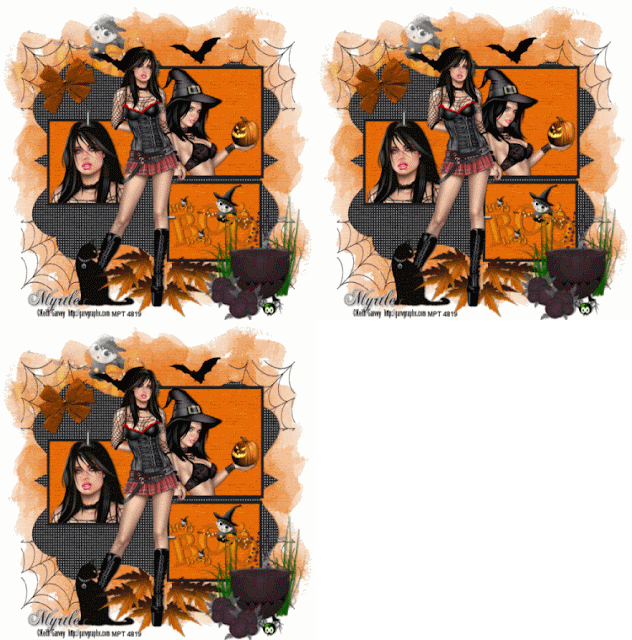
Wednesday, December 15, 2010

Happy New Year -2011


FULL IMAGE

This tutorial was written by Myrtle
On Dec 15th 2010
Was written in PSP 9
Any verison will work
Any Simularity to any other tutorial is purely Coincidental
The ideas for this tutorial are my own


Do not copy or rip my tutorials
do not copy them to any group site
Groups are welcome to use my tutorials..
Just don't claim them as your own

This tutorial is for ones that knows PSP well

Tools Needed

Scrap Kit Bling In The New Year FTU
Mask WSL_Mask 84
Tube
Filters
Eyecandy 4000
DSB Flux Bright Noise

Scrap Kit by A Taggers Scrap

HERE

Mask by Weescotslass

HERE

Put WSL_Mask 84 in your PSP Mask Folder

Tube of Choice
I am using artwork from Keith Garvey
You will need a License# to use his artwork


HERE

Template # 43 by MilissazCreadionz

HERE

Scroll down to bottom of page and click on download
Zip File Template#43

Open template#43 Delete Copyright
Template#43 click on Circle Layer
Selections Select All
Float
Defloat

Scrap Kit Paper 4 Copy and Paste
as new layer
With your Mouse pull the paper until
you have top left corner designs in selections
Selections Invert Delete
Selections Select None

Template#43 click on Circle Frame layer
Selections Select All
Float
Defloat
Fill with Color Gradient Gold
Linear Style
Angle 43
Repeats 0
Click Ok

Flood fill Circle Frame with the Gold Gradient
Selections Select None

Template #43 click on Gold Frame

Scrap Kit Element Frame 1
Copy and Paste as New Layer
Resize 70 Percent 2 times
With Deformation Tool pull out on all sides
Look at mine

Template#43 click on Paper Raster
Selections Select All
Float
Defloat

Find your tube of choice
if using same tube as I am use close up
resize 70 percent resize 80 percent
Copy and Paste as New Layer
Selections Invert Delete

Scrap Kit Paper 6 Copy and Paste
as New Layer
Move Paper above Background Layer

Layers Load/Save Mask
Load Mask From Disk
Find Mask WSL_Mask 84

Source Luminance Checked
Fit to Canvas Checked
Hide All Mask Checked
Click Load
Merge Group

With Deformation Tool Pull Mask
out on all sides some

Template#43 Click on Squares Layer
Selections Select All
Float
Defloat

Layers New Raster Layer
Fill with Color #353843
Selections Select None

Template#43 Click on Squares Frame
Selections Select All
Float
Defloat

Layers New Raster Layer
Fill with Gold Gradient

Selections Select None

Template#43 Click on Glitter Trails
Selections Select All
Float
Defloat
Fill with Gold Gradient

Template #43 Click on Swirls Layer
Layers New Raster Layer
Selections Select All
Float
Defloat
Fill with Gold Gradient

Template #43 Click on Rectangles Layer
Selections Select All
Float
Defloat

Scrap Kit Paper 3 Copy and Paste as New Layer

Template#43 Click on Rectangles Frame
Selections Select All
Float
Defloat
Layers New Raster Layer
Fill with the Gold Gradient
Selections Select None

Scrap Kit Duco Element 2
Copy and Paste as New Layer
Resize 65 Percent 2 times
Place like mine Duplicate Mirror

If you are using same Tube I am
Copy and Paste 2011 tube and Resize 65 Percent 3 times

Write out Tex5 Happy New Year
in Font of Choice I used Chopin Script

I used Gradient Glow on mine

Settings
Eyecandy 4000
Glow Width 3.00
Soft Corners 25
Overall Opacity 100
Draw Only Outside Selections Checked
Click Ok

Add your Copyrights and Name
I used Gradient Glow on my name
Same Setting and Color

Ready to Animate

On Element Duco 2 Merge Down
Click on the Merged Duco 2 Layer

Effects Plugins DSB Flux
Bright Noise Intensity 39
Mix Click 1 Time
Click Ok

CopyMerge
Animation Shop
Paste as New Animation

Back to PSP Edit Undo Bright Noise

Effects Plugins Dsb Flux Bright Noise
Same Settings Click on Mix 2 times
Click Ok

Animations Shop
Paste After Currant Frame
Back PSP Edit Undo Bright Noise

Effects Plugins DSB Flux Bright Noise
Same Settings Click on Mix 3 times
Click Ok
Copy Merge
Animation Shop
Paste After Currant Frame

Click on View Animation
If look ok Resize and Save As


Thanks for doing my tutorial
Hope you enjoyed doing my tutorial as much
as I did writing it..
Registered with TWInc

~~~~~~~~~ Myrtle ~~~~~~~~


Sunday, December 12, 2010

Hello a note on my Christmas Honeies tutorial

Hello,
Just a note to let you know I have redone my Christmas Honeies Tutorial and hope you will like the new one .. I have added supplies to this one.. enjoy doing this one..

The supplies from the old one were there there any more for you to get to do the tutorial..
Happy PSP ing..

Myrtle

Tuesday, November 30, 2010

Chrisrmas 2010


FULL VIEW


This tutorial was written by Myrtle
on Dec 2 2010
This tutorial was written in PSP 9
any verison will work
Any Simularitiy to any other tutorial
is purely Coincidental
All the ideas of this tutorial are mine only
Do not claim as your own

You can use my tutorial for groups
Do not copy or rip my tutorial

Tools Needed
Scrap Kit Christmas Bliss by Doris FTU
Mask WSL+Mask 84
Tube

Filters
EyeCandy 4000 Gradient Glow
DSB_Flux Bright Noise

Scrap Kit Christmas Bliss by Doris
HERE

Mask WSL_Mask 84 by weescotslasscreations

HERE

Put mask in your PSP Mask folder

Tube of Choice
I am using artwork by Keith Garvey

HERE
Do not use same tube as I am unless you have a License # to use

Open New Image 800X800 Pixels
Flood fill with color white

Scrap Kit paper 2 copy and paste as new layer
Layers Load/Save Mask
Load Mask from Disk
Look for Mask WSL_Mask 84

Source Luminance Checked
Fit to Canvas Checked
Hide All Mask Checked
Click Load
Merge Group
Drop Shadow

Shadow Settings
Vertical 2
Horizonal 2
Opacity 50
Blur 4.00
Color Black
Click Ok

Find your tube of choice
I am using artwork by Keith Garvey
To use his art work you will need
a License#
HERE

Click on close up tube
Copy and Paste as new layer
Place tube on mask layer
Resize 80 Percent place tube like mine
over mask layer
With Freehand Tool trim off corner of tube
Layer Palette lower Opacity to 30 Percent

Scrap Kit find Element Ornment 1
Copy and Paste as new layer
Place right of mask resize 80 Percent

With Freehand Tool cut loop off
Selections Select None

Scrap Kit Element Sleigh
Copy and Paste as new layer
Place on right in front of tree
Resize 80 Percent same drop shadow

With Freehand Tool go around inside of Seligh
Scrap Kit Element Xmas Gift 5
Resize 80 Percent
Copy and Paste into Selections
Selections Select None

Scrap Kit Element Xmas Gift 2
Copy and Paste as new layer resize 80 Percent 3 times
Place like mine Drop Shadow

Scrap Kit Element CB Bear
Copy and Paste as new layer
Resize 80 Percent 2 times
Place on front of Seligh Drop Shadow

Scrap Kit Element Light Post
Copy and Paste as new layer
resize 80 Percent 3 times
Place like mine Drop Shadow

Find your tube
Copy and Paste as new layer
Drop Shadow and place like mine

Scrap Kit Element House
Copy and Paste as new layer
resize 80 Percent then 70 Percent 3 times
Place on left side
Drop Shadow

Scrap Kit Element Snowman
Copy and paste as new layer
resize 70 Percent 3 times
Place to the left

Scrap Kit Element Ribbon 7
Copy and Paste as new layer
Place like mine
resize 70 Percent 2 times
Drop Shadow

Scrap Kit Element Ornament 6
Copy and Paste as new layer
resze 70 Percent and place like mine
Drop Shadow

With Scrip Font of choice
Write out Christmas 2010
Eyecandy 4000
Give Gradient Glow
Settings
Glow Width 3.00
Soft Corners 25
Overall Opacity 100
Draw Only Outside Selections Checked
Click Ok

Add Your name and copyright
Give your name same Gradient Glow

Ready to Animate

Click on Icicle Element

DSB Flux Filter Bright Noise

Settings

Effects DSB Flux Bright Noise
Intensity 28
Mix 1 time
Click Ok

CopyMerge

Animation Shop

Paste as New Animation

Back to PSP
Edit Undo Bright Noise
Effects DSB Flux Bright Noise
Same Seettings
Click Mix 2 times
Click Ok

CopyMerge

Animation Shop
Paste after Currant Frame

Back PSP
Edit Undo Bright Noise

Effects DSB Flux Bright Noise
Same Settings
Click Mix 3 times
Click Ok

Copy Merge
Animation Shop

Paste after Currant Frame

View
Animation
If look ok Resize and save as

All done .. hope you liked doing my tutorial
as much as I did writing it
Thanks for doing my tutorial
Registered with TWInc

~~~~~ Myrtle ~~~~~


Thursday, November 18, 2010

Magic Christmas


FULL VIEW

This tutorial was written by Myrtle
on November 16th 2010

Was written in PSP 9, any verison will work

This tutorial is my own creations

Any simularity to any other tutorial
is purely coincidenatal

Supplies
unzip supplies and place on your animation workspace

Tools Needed

Scrap Kit Magic Christmas by Fantasy Dreams FTU
Tube of choice
Mask WSL_Mask 84 by
wee Scotslass Creations

Eyecandy 4000
DBA Template#199

Scrap Kit Magic Christmas by Fantasy Dreams

HERE

Mask WSL_Mask8

HERE

Put WSl_Mask 84 in your psp mask folder

Tube of choice , I am using artwork by Keith Garvey
you will need a License# to use his artwork
the artwork I am using was a Christmas Gift from MPT
do not use unless you got the Christmas Gift Package from MPT

HERE

Eyecandy 4000 Plugin Filter
Template#199 by designs by ali

HERE

Open template#199 click on raster 1 on template
Selections Select All
Scrap Kit paper 7 copy and paste into selections
Selectins Select None

Layers Load/Save Mask
Load Mask from Disk
Find your mask
WSL_Mask84

Source Luminance Checked
Fit to Canvas Checked
Hide All Mask Checked
Merge Group

Template #199 Click on raster 1
Fill with color white

Template#199 click on raster 3
Selections Select All
Selections
Float
Defloat

Scrap Kit paper 13
Copy and paste as new layer
Selections Innvert Delete
Selections Select None

Template#199 click on raster 5
Selections Select All
Selections
Float
Defloat

Layers new raster layer
Fill with color # 913969

Scrap Kit Element 5 png
Make a new Image Layer
200X 200 Pixels
Fill with color 913969
Copy and paste element 5 png
as new layer merge down the layers
Rename your image Bell
Layers rename Bell Mimize

Layers click on color swatch
when open click on Pattern
Scroll to your Bell Image you
just made click ok
Settings
Scale 5
Scale 100
Click Ok
Fill your selections with the Pattern
Selections Select None

Effects 3D Effects Inner Bevel

Settings
Bevel 2
Width 8
Smoothness 0
Depth 3
Ambience 0
Shininess 0
Angle315
Color White
Intensity 50
Elevation 30
Click Ok

Drop Shadow
Effects 3 D Effects Drop Shadow
Veritial 1
Horzonal 1
Opacity 50
Blur 3.00 Color Black
Click Ok

Scrap Kit element 50
Copy and Paste as New Layer
over Raster 7 Like mine
Duplicate Mirror give drop shadow

Template#199 Click on Raster 4
Selections Select All
Selections
Float
Defloat

Scrap Kit paper 15 resize 80 percent
Copy and Paste as New Layer
Selections Invert Delete

Leave Selected find your tube of choice
I am using artwork by Keith Garvey
If you are using same tube as I am you will have
the Christmas Gift package
Do not use if you didn't get the Christmas Gift Package
You must have a License # to use his artwork
Copy and Paste as new layer resize 80 percent 3 times
Selections Invert Delete
Layer Pallete lower Opacity 90 percent

Template#199 click on raster 2
Selections Select All
Selections
Float
Defloat

Layers new raster layer
Fill with the Patter you used earlier
Selections Select None
Use same bevel as before
Drop Shadow

Delete template#199 layers you used
Merge down the 3 layers
the tube background and frame
Duplicate and Mirror and Delete Template #199
delete template#199 raster 6 and raster 4

Template#199 click on copy of raster 2
Selections Select All
Selections
Float
Defloat

Scrap Kit paper 15 resize 80 percent
Copy and Paste as new layer
Selections Invert Delete
Leave Selected

Scrap Kit element 20 resize 80 percent 3 times
Copy and paste as new layer
Give same drop shadow
Selections Select None

Scrap Kit element 80
copy and paste as new layer
resize 80 percent3 times
Place like mine


Template#199 Raster 2 frame
With Magic Wand Tool click inside of frame
Layers new raster layer
Fill with the bell Pattern
Selections Select none
Effects 3 D Effects give same inner bevel
Layer Pallete Delete template layers
Merge new layers down

Scrap Kit element 53
Copy and paste as new layer resize 70 percent 2 times
Place like mine drop shadow
erase parts of candles hanging over frame

Scrap Kit element 44
Copy and paste as new layer
Resize 50 percent
Place like mine

Scrap Kit element 43
Copy and paste as new layer
Resize 50 percent
Place over element 44
With eraser tool erase every other light bulb
Layer Pallete merge down

Scrap Kit element 34
Copy and paste as new layer
resize 70 percent
With Deformation Tool Rotate to look like mine
Drop shadow Duplicate Mirror

Scrap Kit element 1
Copy and paste as new layer
resize 70 percent place like mine
Drop shadow

Add your name and Copyright
I put Gradient Glow on my name
Eyecandy 4000

Settings

Glow Width 4.00
Soft Corners 25
Overall Opacity 100
Draw Only Outside Selections Checked
Click Ok

On your lights Animate
With Freehand Tool
Go around the pink lights

Eyecandy 4000

Settings
Hue Variations 25
Saturation Varitions 30
Brightness Variations 40
Opacity Variation 0
Lump Width 42.00
Lump Height 42.00
Pattern Smooth Lumps
Seanless Tile Checked
Random Seed 1
Click Ok

Selections Select None
CopyMerge

Animation Shop
Paste as new Animation

Back PSP Edit Undo
Select None
On green lights
Freehand Tool
Go around the green lights

Effects EyeCandy 4000
HSB Noise same settings
Click Ok
Selections Select None

Copy Merge
Animation Shop
Paste after currant frame


Now for the Animated Candle Flame
On each candle
Edit
Select all on flame and on Animation tag
Drag Candle Flame to the Candles

Edit undo drag
When you have all flames on candles
View Animation
If look ok resize and save as
Hope I haven't confused you!

Thanks for doing my tutorial
Registered with TWInc
Hope you enjoyed doing my tutorial
as much as I did writing it..

~~~~~~ Myrtle~~~~~


Wednesday, November 10, 2010

Gif from my friend Betsy

This is a gif from my friend Betsy
Betsy thank you for this beauiful gif

Tuesday, November 2, 2010

Drama Queen

Align Center

FULL VIEW


This tutorial was written by me Myrtle
On Nov.2 2010
Was written in PSP 9
Any verison will work

Any Simularity to any other tutorial
is purely Coincidental

Tools Needed

Scrap kit by BC_ Drama Queen _FTU
Tube
Mask WSL_Mask 84
Eyecandy 4000
Alien Skin Xenofex 2

Scrap Kit Drama Queen by BeaCreations

HERE

Mask WSL_Mask 84 by weescotslass creations
HERE


Put mask WSL_Mask84 in your psp mask folder

Tube of Choice
I am using artwork by Keith Garvey
HERE

Lets get started

Open New Image 700X700 Pixels
Scrap Kit paper 5
Copy and Paste as New layer

Layers Load/Save Mask
Load Mask From Disk
Find WSL_Mask 84
Settings
Source Luminance Checked
Fit To Canvas Checked
Show All Mask Checked
Load

Layers New Raster Layer
Fill with Color White
Send to Bottom of Layer Palette

Scrap Kit Frames Frame 5
Copy and Paste as New Layer
With Magic Wand Tool
Click inside Frame
Selections Modifty Expand 5
Scrap Kit paper 17
Copy and Paste as New Layer
Selections Invert Delete

Leave Selected
Find your tube of choice
I am using artwork from Keith Garvey
To use his artwork
You will need a License #

HERE

Copy and paste tube as New Layer
Layer Resize 80 Percent
Selections Invert Delete
Selections Select None

Scrap Kit Pink Butterfly Element
Butterfly 01
Copy and Paste as New Layer
Resize 50 Percent 2 times
Place like mine right corner of frame
Drop Shadow of Choice

On the Frame with Magic Wand Tool
Click inside the Rectangle Area
Scrap Kit Paper 17
Copy and Paste as New Layer
Selections Invert Delete

Effects 3D Effects Inner Bevel
Settings
Bevel 2
Width 8
Smoothness 40
Depth 2
Ambience 0
Shininess 10
Angle 335
Intensity 50
Elevation 30
Color White
Click Ok

Scrap Kit Element Beaded string
Copy and Paste as New Layer
Place over the Bevel Rectangle

Image Rotate Free Rotate
90 Degrees Left
Click Ok
Place like Mine
Image Mirror

With Freehand Tool go around
part you want to save
Selections Invert Delete
Drop Shadow

Scrap Kit Element Flowerpenandant 02
Copy and paste as New Layer

With Freehand Tool Cut Off Lease
Selections Select None
Image Resize 65 Percent
Place over top holes on Frame
Drop Shadow
Duplicate and place on Bottom Hole of Frame

Scrap Kit Element Bow 01
Copy and Paste as New Layer
Place Right Bottom of Frame
Drop Shadow

Scrap Kit Element Doodle 01
Copy and paste as New layer
Drop Shadow

Scrap kit Element Journal 01
Copy and Paste as New Layer
Resize 70 Percent Resize 75 Percent
With Deformation Tool
Move like mine Place Bottom Left
of Frame Drop Shadow

Scrap Kit Element Pen 01
Copy and Paste as New Layer
Resize 75 Percent
Drop Shadow

Add your name and copy rights
Add Name on Journal Font of Choice
I gave my name same Bevel as before

I used A Gradient Glow on my name

Eyecandy 4000 Gradient Glow

Settings

Glow Width 3.00
Soft Corners 25
Overall Opacity 100
Draw Only Outside Selections Checked
Click Ok
Drop Shadow

Layers Click on mask Layer
Scrap Kit Element Glitter 01
Copy and Paste as New Layer
With Deformation Tool
Stretch to cover Mask Layer

Now Ready to Animate

Plugin Alien Skin Xenofex 2
Constellation

Settings

Star Size (Pixel) 2.00
Size Variation 1
Edge Star Density 1
Overall Size Density 0
Overdrive 100
Twinkle Amount (%) 75
Twinkle Rotation (*) 45
Keep Original Image Checked
Random Seed 1
Click Ok

CopyMerge
Animation Shop
Paste as New Animation

Back to PSP
Edit Undo Constellation
Effects Alien Skin Xenofex 2
Constellation
Same Settings Click Random Seed 1 time

CopyMerge

Animation Shop
Paste After Currant Frame

Back PSP
Edit Undo Constellation

Effects Alien Skin Xenofex 2
Constellation
Same Settings Click Random Seed
Click Ok

CopyMerge

Animation Shop
Paste After Currant Frame

View Animation
If look ok Save As

Thanks for doing my tutorial
Hope you enjoyed doing my tutorial
as much as I enjoyed writing it

Registered with TWInc

~~~~~ Myrtle ~~~~~


Sunday, October 24, 2010

Blue Delight

This tutorial was written on Oct 23rd 2010
Was written in PSP 9 any verison will work
Any simularity to any other tutorial is purely Coincidental
Tools Needed
Scrap Kit
Mask
Eyecandy 4000 Filter
DSB Flux Filter
Scrap kit Blues by bubbles-dream
WSL_Mask 84 by weescotslasscreations
Put mask in your psp mask folder
Tube of choice
I am using artwork from Keith Garvey to use his artwork
you will need a Lisense#
do not use same tube I am with out Lisense
Lets begin with our tutorial
Open new image 700 X 700 fill with colour white
We can resize later
Layers new raster layer
Selections select all
Scrap kit paper 5 copy and paste into selection
selections select none
Layers Load/Save Mask Load Mask from Disk
Find WSL_Mask 84
Source Luminace checked
Fit to canvas checked
Show all mask checked
Load Merge Group
Scrap kit frame 2 copy and paste as new layer
Resize 85 percent
Scrap kit frame 3 copy and paste as new layer
resize 85 percent place over frame 2
On frame 2 with magic wand click inside
Selections modifty expand 3
Scrap kit paper 7 copy and paste as new layer
Selections invert delete
move below frame 2 keep selected
Find your tube of choice
I am using artwork of Keith Garvey
to use his artwork you need a license #
Copy and paste close up tube resize 80 percent
selections invert delete
selections select none drop shadow
Scrap kit element doodle jewel
copy and paste as new layer like mine
Eyecandy 4000 Gradient Glow
Settings
Glow Width 3.00
Soft Corners 25
Draw Only Outside Selections Checked
Click Ok
Click on raster 4 on layer Pallete
behind your tube selections select all
Float
Defloat
Scrap kit element curtain copy and paste as new layer
resuze 80 percent 2 times
selections select none
Scrap kit butterfly png copy and paste as new layer
resize 80 percent 3 times with deformation tool
rotate right like mine drop shadow
duplicate and mirror and place right bottom like mine
Scrap kit element saphirflower png copy and paste as new layer
drop shadow duplicate and place like mine
Scrap kit paper 3 copy and paste as new layer
with deformation tool pull out to edges of wheite background
Scrap kit element corners copy and paste as new layer
duplicate mirror duplicate flip duplicate mirror
Scrap kit element pearls copy and paste as new layer
duplicate flip duplicate rotate 90 degrees left
duplicate mirror place under corners
Add your name and copyrights
I put gradient glow on my name
Settings as before
Font of choice
Font I used HERE Honey Script
Ready to animate click on the curtain layer
Effects DSBFlux filter bright noise
Settings
Intensity 35 Mix 1 time click ok
Copymerge
Animation Shop
Paste as new animation
Back to PSP Edit undo bright noise
Effects Bright Noise
Same Settings
Click on Mix 2 times
Copy Merge
Animation Shop
Paste after currant frame
Back PSP Edit undo bright noise
Effects Bright Noise
Click on Mix 3 times
Copy Merge
Animation Shop
Paste after currant frame
View animation if look ok resize and save as
Thanks for doing my tutorial
Hope you enjoyed doing my tutorial as much
as I did writting it..
Registered with TWInc
~~~~~ Myrtle ~~~~


Tuesday, September 28, 2010

Bippity Boppity Boo

This tutorial was written by Myrtle
on September 27th 2010
was written in PSP 9 any verison will work
Any simularity to any other tutorial is purely coincidental
Tools Needed
Template #1
Scrap Kit FTU
Eyecandy 4000
Xenofex2
WSL_Mask 254
Tubes of Choice
Spider web of choice
Spiders of Choice
Scrap Kit by Tootyputscraps
Template #1 Halloween by designsbyali
Tubes of Choice
I am using artwork from Keith Garvey
WSL_Mask 254
put mask wsl_mask 254 in your psp mask folder
Open template#1
Scrap kit paper 10 copy and paste as new layer
Layers Load/save mask
Load mask from disk merge group
copy and paste your spider web of choice and paste spiders of choice
place like mine
Template #1 click on raster 3 selections select all
Float
Defloat
scrap kit paper 3 copy and paste as new layer Selections invert delete
leave selected
Scrap kit element wordart 4 resize 55 percent 3 times copy and paste
as new layer place like mine on lower right box
find your tubes of choice
I am using artwork of Keith Garvey to use his artwork you need a license#
copy and past tubes as new layers selections invert delete
erase all tube hanging over boxes with eraser tool place like mine
if using same tubes as I am resize tube with cat 115 percent
copy and paste as new layer
Template #1 click on raster 1
Scrap kit paper 1 copy and paste as new layer selections invert delete
Effects texture effects weave
Settings
Gap Size 2
Width 4
Opacity 3
Weave and Gap color white
Fill Gaps Checked
Click Ok
Scrap kit element grass copy and paste as new layer
resize 55 percent 2 times place like mine
Add elements of choice and resize and drop shadow all tubes and elements
Add your name and copyrights
On my name I used gradient glow
Eyecandy 4000
Settings
Glow Width 4.00
Soft Corners 25
Overall Opacity 100
Draw Only Outside Selections Checked
Click Ok
Ready to animate
On your spider web
Kenofex2 Constellation
Settings
2.00-1-1-0-100-75
Keep Original image checked
Random Seed 1
Click Ok
Copemerge
Animation Shop
Paste as new animation
CLICK
Back PSP Edit undo Constellation
Effects Xenofef2 Constellation
Same settings click on Random Seed
Ok Copymerge
Animation Shop
Paste after current frame
Back PSP
Edit undo Constellation
Effects Xenofex2 Constellations same settings
Click Random Seed
Click Ok
Copemerge
Animation Shop
Paste after current frame
View Animation
If look ok save as and resize 80 percent
Thanks for doing my tutorial
Registered with TWInc..
Hope you enjoyed doing my tutorial as much as I did writing it..
~~~~~ Myrtle ~~~~

Tuesday, August 10, 2010

STRAWBERRYPLEASURES


VIEW FULL IMAGE HERE


This tutorial was written by Myrtle on Aug 9th 2010


Was written in PSP 9 andy verison will work


Any simularity to anyother tutorial is purely Coincidental


This tutorial is from my image only


Tools Needed


Scrap Kit FTU

Template#4

Eyecandy 4000

Tube

WSL_Mask 84


WSL_Mask 84 from WEESCOTSLASS CREATIONS


put WSL_Mask in your psp mask folder


ScrapKit by Doris


Template#4 by Doris


Tube I used by Keith Garvey


Open template#4 delete copyrights

template#4 click on Raster 1 fill with colour white


Template#4 click on raster 6 frame

Selections select all

Float

Defloat

Layer new raster layer fill frame with color white


Scrap kit element 1 resize

edit copy and paste as new layer on frame like mine

resize to fit top and duplicate flip to bottom of frame like mine


Template # 4 raster 7 selections select all


Float

Defloat


Scrap kit paper 6 copy and paste as new layer

selections invert delete


selections select none


Template#4 click on raster 11 magic wand click inside of frame


find your tube of choice I am using artwork from Keith Garvey

to use his artwork you will need a license #


copy and paste as new layer look at mine

Selections invert delete with deform tool rotate like mine

paste your tube again over your tube effects drop shadow


with freehand tool draw around part of tube hanging over frame


Template#4 click on raster 4 selections select all

Float

Defloat


Scrap kit paper 6 copy and paste as new layer selections invert delete


Selections select none

Effects texture effects weave


Settings

Gap Size 1

Width 3

Opacity 4

Weave and Gap color white

Fill gaps checked


Eyecandy 4000 Gradient Glow


Settings

Glow Width 3.00

Soft Corners 25

Overall Opacity 100

Draw Only Outside Checked

Click Ok

Drop Shadow


Template#4 click on raster 5 Selections select all

Float

Defloat


Scrap Kit paper 7 resize 70 percent 2 times

copy and paste as new layer


Selections select all

Float

Defloat


Sellections select none give same gradient glow and drop shadow


scrap Kit element strawberry resize 70 percent

copy and paste as new layer drop shadow

drop shadow

crap kit glitter bits copy and paste like mine erase part on strawberry


Template#4 click on raster 2 selections select all

Float

Defloat

Scrap kit paper 6 copy and paste as new layer

selections invert delete select none


give sane gradient glow and drop shadow


Template#4 raster 3 selections select all

Float

Defloat


Scrap kit element flower 2 copy and paste as new layer

resize 70 percent 3 times drop shadow place like mine


Scrap kit element flower 4 copy and paste as new layer

resize 70 percent 3 times drop shadow


Scrap Kit paper 6 copy and paste as new layer and move above background layer

Find your WSL_Mask 84 merge group


Template#4 click on raster 9

Selections select all

Float

Defloat


Scrap kit paper 6 copy and paste as new layer selections invert delete

give same gradient glow and drop shadow

do heart same way


Scrap kit #4 click on background layer


Scrap kit paper 6 copy and paste as new layer

Find your WSL_Mask 84

Layers Load/save load mask from disk WSL_Mask 84

Merge Group


Add your name and copyrights

I gave my name same gradient glow drop shadow


Thanks for doing my tutorial

hope you like doing my tutorial as much as I did writing it


Registered with TWInc


~~~~~~ Myrtle ~~~~~~


Saturday, July 24, 2010

SWEET HARMONY


This tutorial was written on July 24th 2010 by me
Was written in PSP 9 any verison will work
Any simularity to any other tutorial is purely coincidental
This tutorial is my own ideals
Tools Needed
Template# 166 by designsbyali
Scrap Kit by Scrappingmar FTU
Mask by WSL_Mask84
Save mask in PSP mask folder
Open Template#166 delete copyrights
Click on raster 1 fill with color white
Scrap Kit paper 6 resize 80 percent copy and paste as new layer
go to layers Load/Save Mask Load Mask From Disk
merge group
Template # 166 click on raster 2 Selections Select All
Float
Defloat
Scrap Kit paper 8 resize 60 percent 4 times
Selections Invert Delete Selections Select None
Effects Tramages Filter tow the line
Default Settings delete template raster 2 drop shadow
Template #166 click on raster 7
Selections Select All
Float
Defloat
Scrap Kit paper 13 resize 25 percent
Copy and paste as new layer
Resize 45 percent Selections Invert Delete
Selections Select None with deformation tool stretch out on both ends
Template3166 delete layer raster 7
Effects inter bevel default settings drop shadow
Graphic Plus Filter
Cross shadow default settings
Template#166 click on raster 8 Selections Select All
Float
Defloat
Scrap Kit paper 6 resize 45 percent 3 times
Copy and paste as new layer Selections Invert Delete
Selections Select None deformation tool pull up and down delete template layer 8
Effects Graphic Plus Filter cross shadow
default settings drop shadow
Template#166 click on raster 3
Selections Select All
Float
Defloat
Scrap Kit paper 1 resize 20 percent copy and paste as new layer
Selections modifty expand 3 Selections Select None
do other two same way
Select all frames of each
Selections Select All
Float
Defloat
Scrap Kit paper 2 resize 20 percent copy and paste as new layer
Selections Invert Delete Selections Select None
Effects Inner Bevel default settings
do other two frames the same
Template#166 click on bow layer
Scrap Kit element 35 copy and paste as new layer
resize 50 percent 2 times resize 60 percent drop shadow
delete template166 bow layer
Template #166 click on flower layer raster 6
Scrap Kit element 17 copy and paste as new layer
resize 50 percent and place over flower delete template flower drop shadow
Template #166 click on each blue square and paste tube of choice
I am using artwork from Jamie Kidd To use her artwork
you will need a license #
HERE
Selections Select All
Float Defloat
Copy and paste tube and resize to fit like mine do same for other 2 tubes
copy and paste as new layers
Scrap Kit element 59 copy and paste as new layer resize 16 percent
Scrap Kit element 39 copy and paste as new layer resize 80 percent 2 times
Add your name and copyrights
I added gradient glow to my name
Eyecandy 4000 Gradient Glow
Settings
Glow Width 3
Soft Corners 25
Overall Opacity 100
Draw Only Outside Selections Checked
Click Ok
Merge Flatten Layers Save as JPG and resize
Hope you enjoyed doing my tutorial
as much as I did writting it
Thanks for doing my tutorial
Registered with TWInc
~~~~~~ Myrtle ~~~~~~

Sunday, June 20, 2010

Let Freedom Ring


FULL VIEW

This tutorial was written by Myrtle on June 20th 2010

Was written in PSP 9 any verison will work

Any simularity to any other tutorial
is purely coincidental

All the ideas for this tutorial is strickly all mine

Tools Needed

Tramages Plugin
Alien Skin Plugin Xenofex2
Eyecandy 4000
Tube

Mask 146 by Vixpsp scroll down to May 10th 2008
Vix Mask 141-180

HERE

Put Vix Mask 146 in your PSP Mask folder

Tube
I am using the beauiful artwork of Keith Garvey
to use this artwork you need a license #

HERE

Open new raster layer 600X600
fill with colour white

New raster layer fill with colour #3d4560

Layers Load/Save Mask find your Vixpsp Mask 146
delete mask say yes merge group

Layers new raster layer fill with colour a foreground and background
color from your tube make a gradient from the two colors

New raster kater fukk with your foreground /background gradient

Preshape tool find star 2
Settings
Antialis checked
Create as vector checked
Line style solid Width 30.00
With gradient in foreground color box you made
Draw out a star size of star in center of mask
when covered layers convert to raster layer

With Tamages Plugin filter Tow The Line

Settings

Control 0 80
Control 1 54
Control 2 48
Control 3 9
Click OK

With Magic Wand click inside of the star you just made
Selections modifty expand 6

Layers new raster layer and fill with colour #960000
Selections select none

Effects Texture effects weave

Settings
Gap Size 1
Width 6
Opacity 4
Weave colour white
Gap colour white
Fill Gaps Checked
Click Ok

Give Gradient Glow color white
Settings
Glow Width 4.00
Soft Corners 25
Overall Opacity 100
Draw Only Outside Selections Checked
Click Ok

Give same gradient glow to both stars and drop shadow

Add tube of choice
I am using artwork of Keith Garvey
To use his artwork you need a license# to use

Place tube like mine and resize 80 percent 2 times
With freehand tool trim what is hanging over star

Layers Pallette lower opacity to 50 percent
trim off bottom of tube hanging over star
Layers put opacity back to 100 percent

Write text sayings of choice
I used red and blue glitter patterns
use patterns of choice

Add your name and copyrights
I used same gradient glow on my name

Ready to animate click on mask layer
Alien Skin Xenofex2 Constellation

Settings

Star Size 2.00
Size Variation 0
Edge Star Density 1
Overall Star Density1
Overdrive 100
Twinkle Amount 75
Twinkle Rotation 45
Keep Original Image Checked
Random Seed 1
Click Ok

Copymerge Animation Shop
Paste as new Animation

Back to PSP Edit undo Constellation
Effects Xenofex2 Constellation
Click random Seed
Click Ok

Copy Merge Animation Shop
Paste After Current Frame

Back to PSP Edit undo Constellation
Effects Xenofex2 Constellation
Same settings
Click Random Seed
Click Ok

Copymerge Animation Shop
Paste after Current Frame

View Animation if look ok resize and save as gif


Thanks for doing my tutorial

Registered with TWInc

If you do my tutorials would like to see your results
and to post them on my slide show

~~~~~~ Myrtle ~~~~~


Sunday, June 13, 2010

Americana


This tutorial was written by me on June 12th 2010
Any simularity to any other tutorial is purely Coincidental
And was written in PSP 9 any verison will work
Tools Needed
Scrap Kit FTU
Mask WSL_Mask38
Alien Skin plugin Constellation
Eyecandy 4000
Template #64
Tube
Skrap Kit by Candy Treats
BP_Template#64 by Becky
Tube
I am using artwork from Keith Garvey you need a license to use
Mask WSL_Mask 38
Put mask in your psp mask folder
Open template#64 close and delete preview layer
TOU layer and text layer
Click on image 5 of template#64
Selections select all
Float
Defloat
Layers new raster layer fill with colour white
Scrap Kit ct americana text copy and paste into selections
Selections select none
Effects eyecandy 4000 gradient glow
Settings
Glow Width 4
Soft Corners 25
Overall Opacity 100
Draw Only Outside Selections Checked
Colour Red
Click Ok
Drop Shadow
Template#64 Image 2
Selections Select All
Float
Defloat
Scrap Kit paper 9 resize 75 percent
Copy and paste as new layer
Selections invert delete selections select none
give same gradient glow and drop shadow
Template#64 click on image 4
Selections select all
Float
Defloat
use same paper as before selections invert delete
Template#64 image 4 frame click on
Selections select all
Float
Defloat
Scrap Kit paper 4 resize 75 percent
copy and paste as new layer selections invert delete
Selections select none
Eyecandy 4000 give same gradient glow as before
change glow colour to white drop shadow
Template#64 click on image 3
Selections select all
Float
Defloat
Scrap Kit paper 7 resize 75 percent 2 times
copy and paste as new layer
Selections invert delete selections select none
Effects Eyecandy 4000 gradient glow same settings
change colour to red drop shadow
Template#64 background layer
scrap kit paper 9 copy and paste as new layer
Layers Load/Save Mask
find your WSL_Mask 38 merge group
With deformation tool pull mask out all around
Template#64 click on image 1
Selections select all
Float
Defloat
Scrap Kit bracket 1 element
copy and paste as new layer resize 75 percent
selections invert delete
Leave selected find your tube of choice
If using same tube as I am you will need a License to use
Keith Garvey artwok
Copy and paste your tube resize 75 percent
Selections select none
Paste your tube again over that one resize 75 percent
With freehand tool cut off part of tube hanging over
Template#64 click on image 1 Background
Selections select all
Float
Defloat
Scrap Kit paper 4 resize 75 percent
Copy and paste as new layer selections invert delete select none
Effects eyecandy 4000 same gradient glow except
change colour to white drop shadow
Scrap Kit element bow wrap 2
copy and paste as new layer resize 75 percent 3 times
and place like mine
With deformation tool pull to edge of red frame
drop shadow pull below doodle layer
Template#64 click on BP curley 1 layer
Selections select all
Float
Defloat
Scrap Kit find seamless glitter red pattern
fill doodle selections select none
Scrap Kit element blomssom 2 resize 75 percent 3 times
place over the template64 flowers
With preshape tool find star 2
with red sparkle pattern draw out a few stars and place out like mine
Scrap Kit find blue glitter pattern and on red frame
write text Happy 4th of July
Add your name and copyrights
Give name same gradient glow
I used Red sparkle glitter for my name
same setting for gradient glow use colour white
Close all layers except for stars and Happy 4th of July
Merge these layers visible
Reopen all layers
Duplicate the merged layer with stars and 4th 2 times
close 2 and 3 layers
Now ready to animate on layer 1
Effects Alien Skin Constellation
Settings
2-0-1-1-100-75
Random Seed 1
Click OK
Animation Shop
Paste as new animation
Back PSP close layer 1 and open layer 2 give same constellation
click random seed
Click Ok
Animations Shop
Paste after current frame
Back PSP close layer and open layer 3
same constellations settings click Random seed
Click Ok
Animation Shop
Paste after currant frame
Click on View Animation
if look ok resize and save as
Thanks for doing my tutorial
Registered with TWInc
~~~~~ Myrtle ~~~~~