
View Full IMAGE
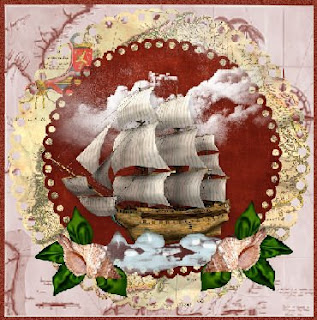
Sea Inside
This tutorial was written by Myrtle
on March 11th 2009
Any simularity to any other tutorial
is purely coincidental
and was written in PSP 9 any verison will work
Tools Needed
Scrap Kit
Tube and image of choice
Eyecandy 4000
Template 7
Mask
Mask WSL_Mask 116 HERE Put mask in your PSP mask folder
Scrap Kit by Scrappingmar HERE
Template 7 by Ali HERE
Open Template7
From scrap kit find paper SMar 11
Resize 85 percent 2 times
copy and paste as new layer above your background
Layers Load/Save Mask
Load Mask from Disk
Find WSL_Mask 116
Source Lumiance checked
Fit to canvas checked
Hide all mask checked
Load
Merge group
With deformation tool pull mask out on sides
Template 7
Click on circle 2
Selections Select all
Selections Float >Defloat
Layers new raster layer
Fill with a color from your island image
Copy and paste your island image of choice
Place image in selection and selections invert >delete
Leave selections selected
From scrap kit find Smar 60 ship
Resize 80 percent 3 times
Copy and paste as new layer place like mine
Click on your image go to preshape tool
With foreground color Gradient Gold
settings angle 45 and repeats 1 click ok
draw out circle line width 6 click ok
Template 7 click on rectangle 2
Selections Select all
Selections Float>Defloat
From scrap kit find paper Smar7 resize 80 percent
2 times copy and paste as new layer
Selections Select none
with deformation tool pull out to sides
Template7 click on rectangle 1
Fill with the gold gradient Inter Bevel of choice
Scrap kit Smar 59 keg resize 80 percent 2 times
Copy and paste as new layer place like mine
Scrap kit find Smar 54 resize 80 percent 2 times
Place like mine
Copy and paste your main tube of choice
I am using artwork of Elias Chatzouds
you will need a license to use his artwork
If using the same tube I am lower layer opacity
and trim out the pariots head with freehand tool
Add Elements of choice and resize and drop shadow of choice
Add your name and copyrights
Font of choice
I used a gradient glow on my name and text of choice
Effects
Eyecandy 4000 Gradient Glow
Glow Width 3.00
Soft Corners 25
Overall Opacity 100
Draw Only Outside Selections checked
Click OK
Now for Animation
Effects Eyecandy4000 on Torch Flame
With freehand tool go around the flame
Effects Eyecandy 4000 HSB Noise
Settings
Hue Variation 25
Saturation Variation 30
Brightness Variation 40
Opacity Variation 0
Lump Width 38.00
Lump Height 28.00
Patterns Smooth Lumps
Random Seed 1
Click OK
Copy Merge Animation Shop
Paste as new Animation
Back to PSP Edit undo select none undo HSB Noise
Effects Eyecandy 4000 HSB Noise
Same settings click Random Seed
Click OK
Copy Merge Animation Shop
Paste after current frame
Back to PSP
Edit undo select none undo HSB Noise
Effects Eyecandy 4000 HSB Noise
Same settings
Click Random Seed
Click OK
Animation Shop paste after current frame
View Animation if look ok
resize and save as
Thanks for doing my tutorial
Registered with TWInc
Myrtle
Would like to see your results
Send me email with results and I will post on
my slide show for results
No comments:
Post a Comment